|
By Graham K. Rogers

Many of the panels in System Preferences remain unchanged with the update to OS X to 10.10, Yosemite, apart from the updated interface. The Users & Groups preferences have had a number of changes to panel design and the use of iCloud accounts. Users & Groups is used to create and control accounts used in OS X on a Mac including several security aspects as well as control of login items. The panel for Users & Groups preferences is the last in this alphabetical examination of System Preferences.
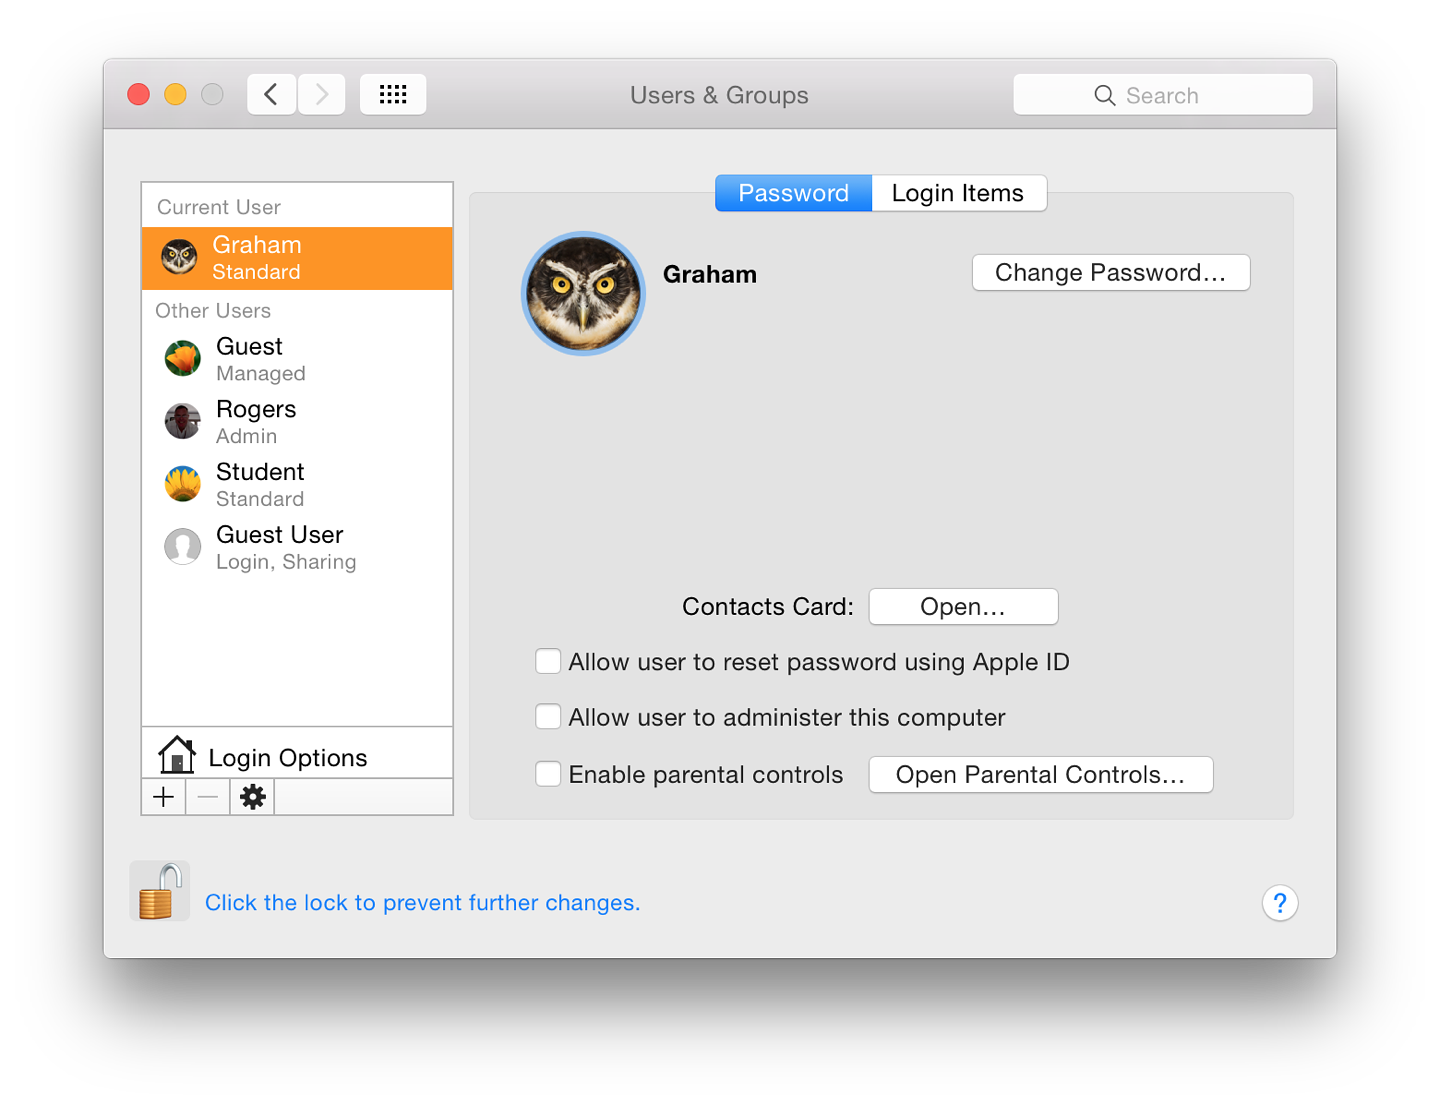
When a user opens the Users & Groups preference panel, the pane shows two main sections. The left part displays basic information of the user account (or accounts). Below the list of users there is a further data entry access: Login Options. As with many of the other preferences panels a padlock icon in the bottom left restricts access and we must have an Admin username and password to open this.
At the bottom of the left panel below the Login Options selector are plus (+) and minus (-) signs to add or delete accounts and a gearwheel icon to access a single item: Set Master Password. This is an overarching password for FileVault which is turned on in Security & Privacy Preferences. It allows access to FileVault if a user has lost or forgotten the password. If the Master Password is forgotten all data encrypted by FileVault will be inaccessible.
To the right is a panel containing information about the highlighted account, with buttons for additional account information. The display will differ, depending on whether the account highlighted is Admin, current User, other User account or Guest.
Users (1)
By default, if there is a single user account in OS X that will have Administrator privileges. This is created when the Mac is first set up by the user.
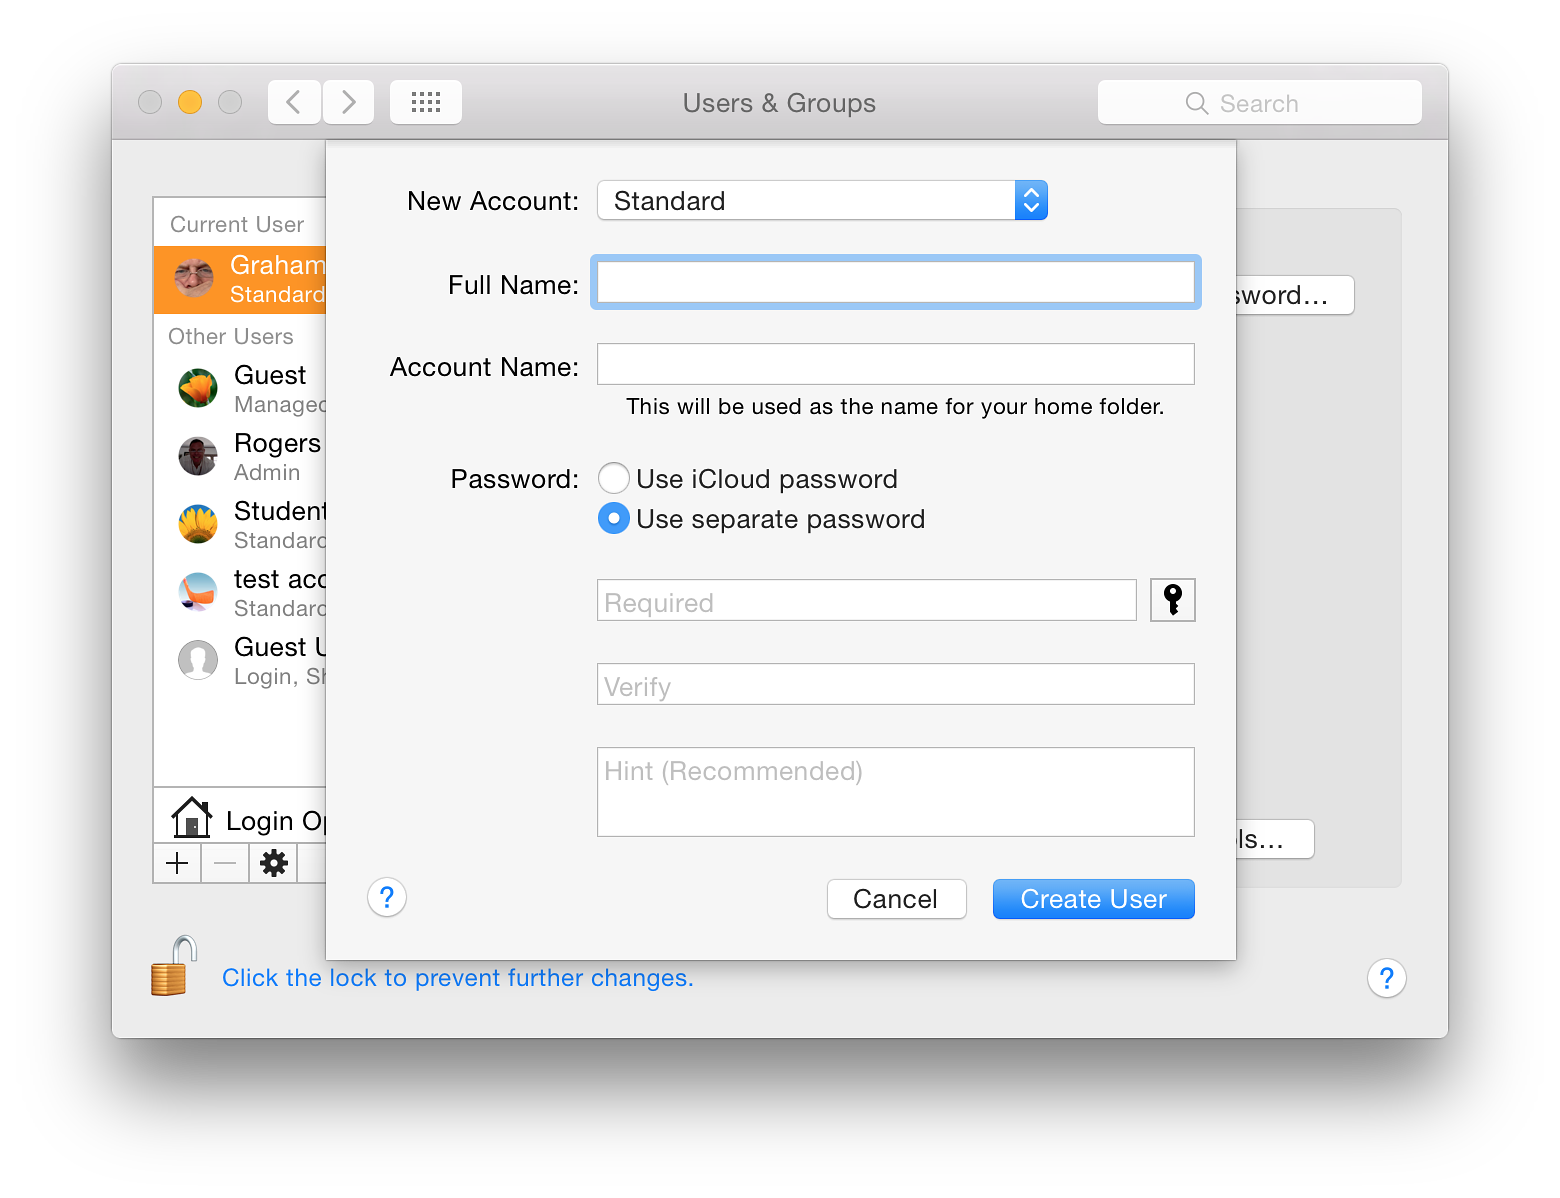
A user may click on the Add icon (+) to create a new account. This displays a panel with the type of account selected by a button and pull down menu. Options are Administrator, Standard, Managed with Parental Controls or Sharing only. A further item is available to create (or add) a group. It is also possible to create a managed account directly within Parental Controls.

Text boxes are available for Full Name and Account name. The full name may be anything the user wants. The Account name was formerly called the Short name. It is critical that, once entered and the account created, this is not changed.
 The Account name affects the behavior of the Home directory and any related functions, including access to data. This is the name the system will use. It will appear as the name beside the Home icon.
A password is entered at this time and needs to be verified. There are now two choices: Use iCloud Password; and Use separate password.
- When the iCloud password option is selected the the iCloud ID needs to be entered in a box below. An internet connection will be needed the first time this account is accessed. Users who have installed Little Snitch may want to ensure that this permits access to iCloud via the new account.
The Password Assistant panel helps a user to choose a password that is somewhat stronger than ABC123 (a common choice). There are five types of password (as well as Manual): Memorable, Letters & Numbers, Numbers Only, Random and FIPS 181 Compliant. This last creates a password that is to an acceptable Federal Information Processing Standard.
FIPS 181 paswords are all lower-case characters (no numbers) while Random introduces a number of numerical and other characters to the mix. The "Memorable" selection uses word-mixes that have some suggestions that may be easier to remember (e.g. causeways45440/antibiotic) although not too easy to crack.
A slider allows the length of the password to be adjusted, from 8 to 31 characters. Below is a color indicator that runs from red through yellow then green. Red is a weak password, while green is good. As the password is being created in the Assistant, so the data is entered in the Account password box.
Unfortunately some users try to use the Enter/Return key instead of a password. This is a dangerous way to try and avoid password use: a warning is given if this is used. I am aware that some users here, for whatever reason, ask the retail outlets to set up their computers. When this is done, the store will use the account name, Apple, and the Enter/Return key instead of a password.
This weak account/password was used by a retail outlet here when my iMac had a hard disk replaced. However, I updated OS X immediately, set up two proper accounts and deleted the one named Apple. Many users do not change either of these, leaving their machines vulnerable.
Once a password is entered and verified - the two entries must match - we may either press Cancel or Create User: OS X will make a new user account which takes a few minutes.
At the bottom of the New Account type panel is the option, Group. If this is selected, the panel for creating a new account is reduced to Full Name only. Once created, a new panel is available with the accounts on the computer listed. Checkboxes beside each of these allow them to be added to membership of the group (see Notes - below). A new group panel shows any groups that already exist, so a group could itself be added to a new group.
Users (2)
To the right of the list of users is a panel with information about the current user (or a highlighted user when the padlock icon is open). At the top is the users icon - displayed in the list of users at login. When the cursor is passed over the picture, the word, "edit" appears. Clicking on that allows the selection of another image in a redesigned panel that appears.
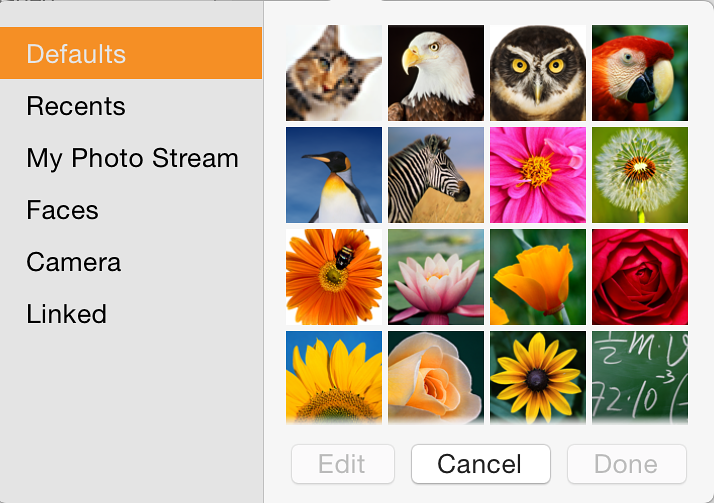
The panel for selection of an image or icon is now in six sections (listed to the left): Defaults, Recents, My Photo Stream (formerly iCloud), Faces, Camera and Linked. When any of the first two (and Faces) are selected, a panel appears with thumbnails of any suitable images shown. When one of these is selected as well as the Cancel and Done buttons, an Edit button is available. The Edit panel has a slider for adjustment of the size, and an icon will allow a user to apply an effect (from 47).
Selecting the Camera activates iSight and a picture can be taken after a 3 second countdown. Users also have the slider and effects options available here.
My Photo Stream asks users to take a photo with an iOS device or manually add images from iPhoto or Aperture. Linked images are those that have been associated with the account in some way. For example, one image shown as "linked" for my User account was used as the account picture some weeks earlier.
To the right of the user icon in the active account is a button marked Change Password. This brings down a panel that allows a change to be made. For other accounts, there is a similar button marked, Reset Password.
A button below is "Contacts Card". When pressed this opens at the user's card in the Contacts application. This can be used for entering data in forms.
Finally in the Password panel there are three checkboxes:
- Allow user to reset password using Apple ID
- Allow user to administer this computer (see Notes - below)
- Enable parental controls. A button alongside allows access to the Parental Controls preference panel.
Login Options
At the bottom of the user panel (on the left) there is a house icon marked Login Options. Clicking on this opens a panel for more fine-tuning of the account. At the top is the Automatic Login button. This is ON by default (when the computer is new) and should be disabled (OFF) for improved security: users must enter passwords to access their accounts.
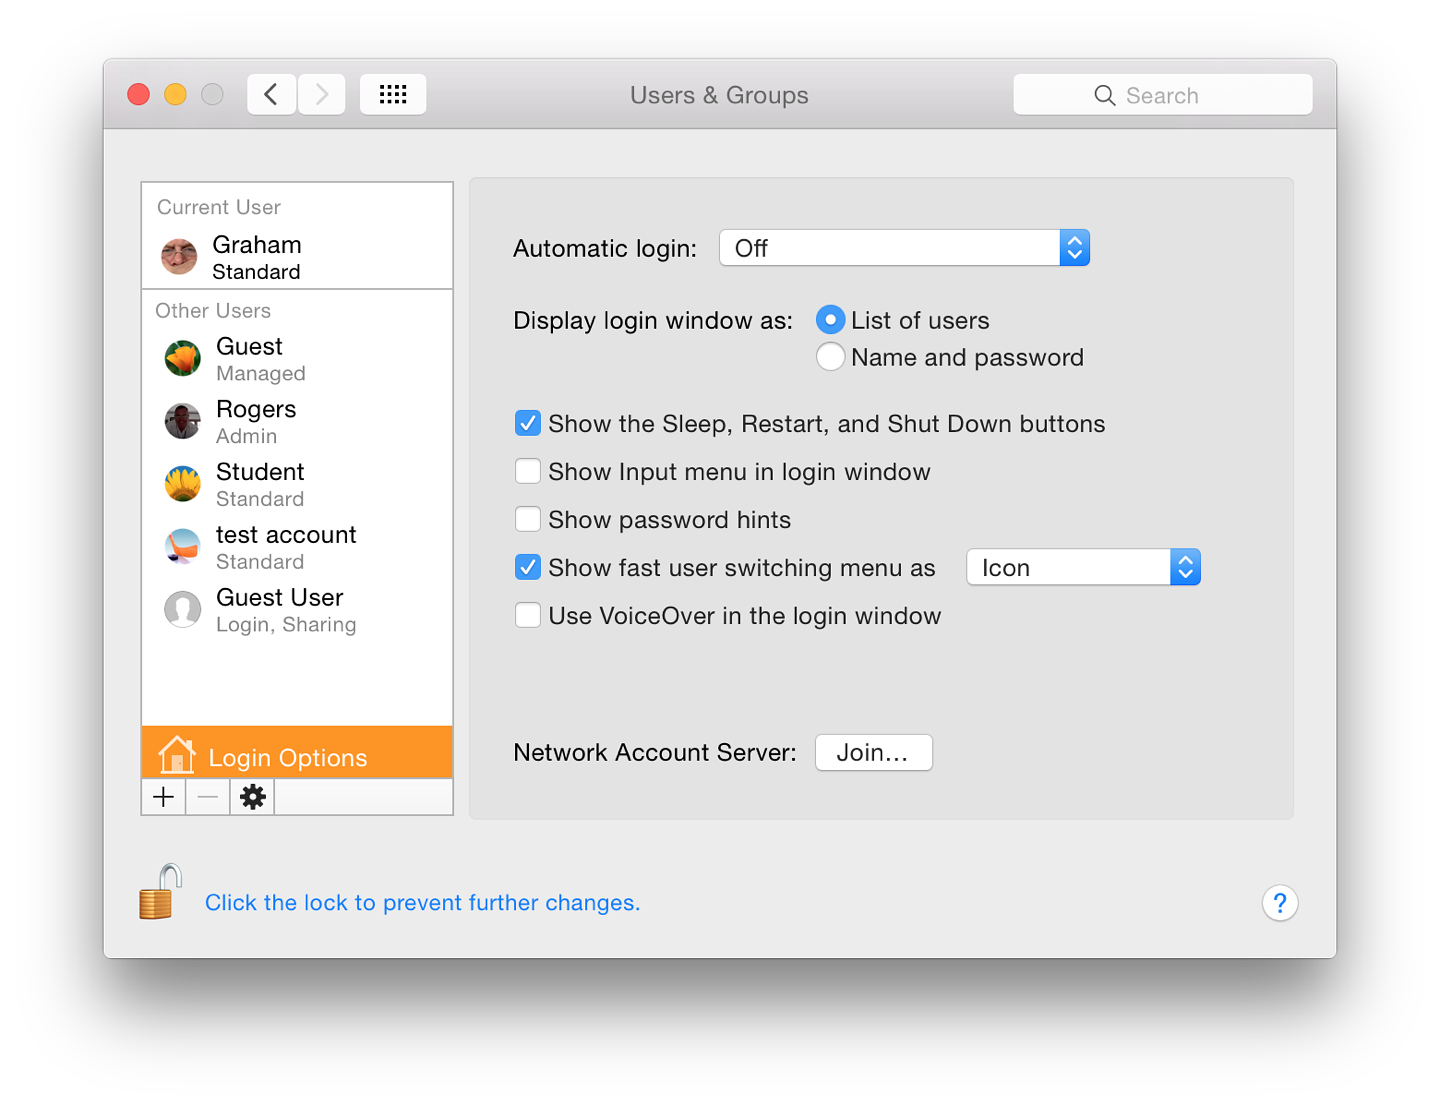
It may be selected for specific accounts, so that when a computer is turned on, that account is always opened. This could be a useful strategy for preventing access to accounts with sensitive or private data and drawing others to a safe account: a honeypot.
At login, we are able to select a display of names of users (and user icons) who have accounts on the computer or simple text boxes in which the name and password must be entered. The latter is more secure.
Below are five check boxes:
- Show the Sleep, Restart and shot Down buttons (This is for the display on the login panel)
- Show input menu in login window (allows selection of different language keyboards);
- Show password hints (if a password is forgotten);
- Show fast user switching menu as
- Full Name
- Account Name
- Icon
- Use VoiceOver in the Login window
With fast user switching it is possible to switch between accounts without logging out or closing applications each time. A menu to effect the switch to another account is on the menu bar.
At the bottom of the panel, next to the words, Network Account Server, is a button marked, "Join". Pressing this opens a panel in which the user may specify either the address of an Open Directory Server or Active Directory Domain. When Server details are entered we press OK (or Cancel).
A button to the left of this panel opens Directory Utility, revealing panels with Services, Search Policy and a Directory Editor. Users should be careful of adding, altering or deleting any information in Directory Services unless they are fully aware of what they are doing. It is suggested that this is only used under the guidance of a System Administrator. Also see Notes, below.
Login Items
The Login Items section displays a panel with a list of those items that a user requires to be available at startup (see Notes, below). The list is in three sections: a checkbox to allow the application to be hidden; the name of the application; and the kind (usually, Application).
Below are + and - icons. Pressing + brings up a Finder window and we may select an application or file (e.g. mp3) to open at startup. The - icon will delete a highlighted item.
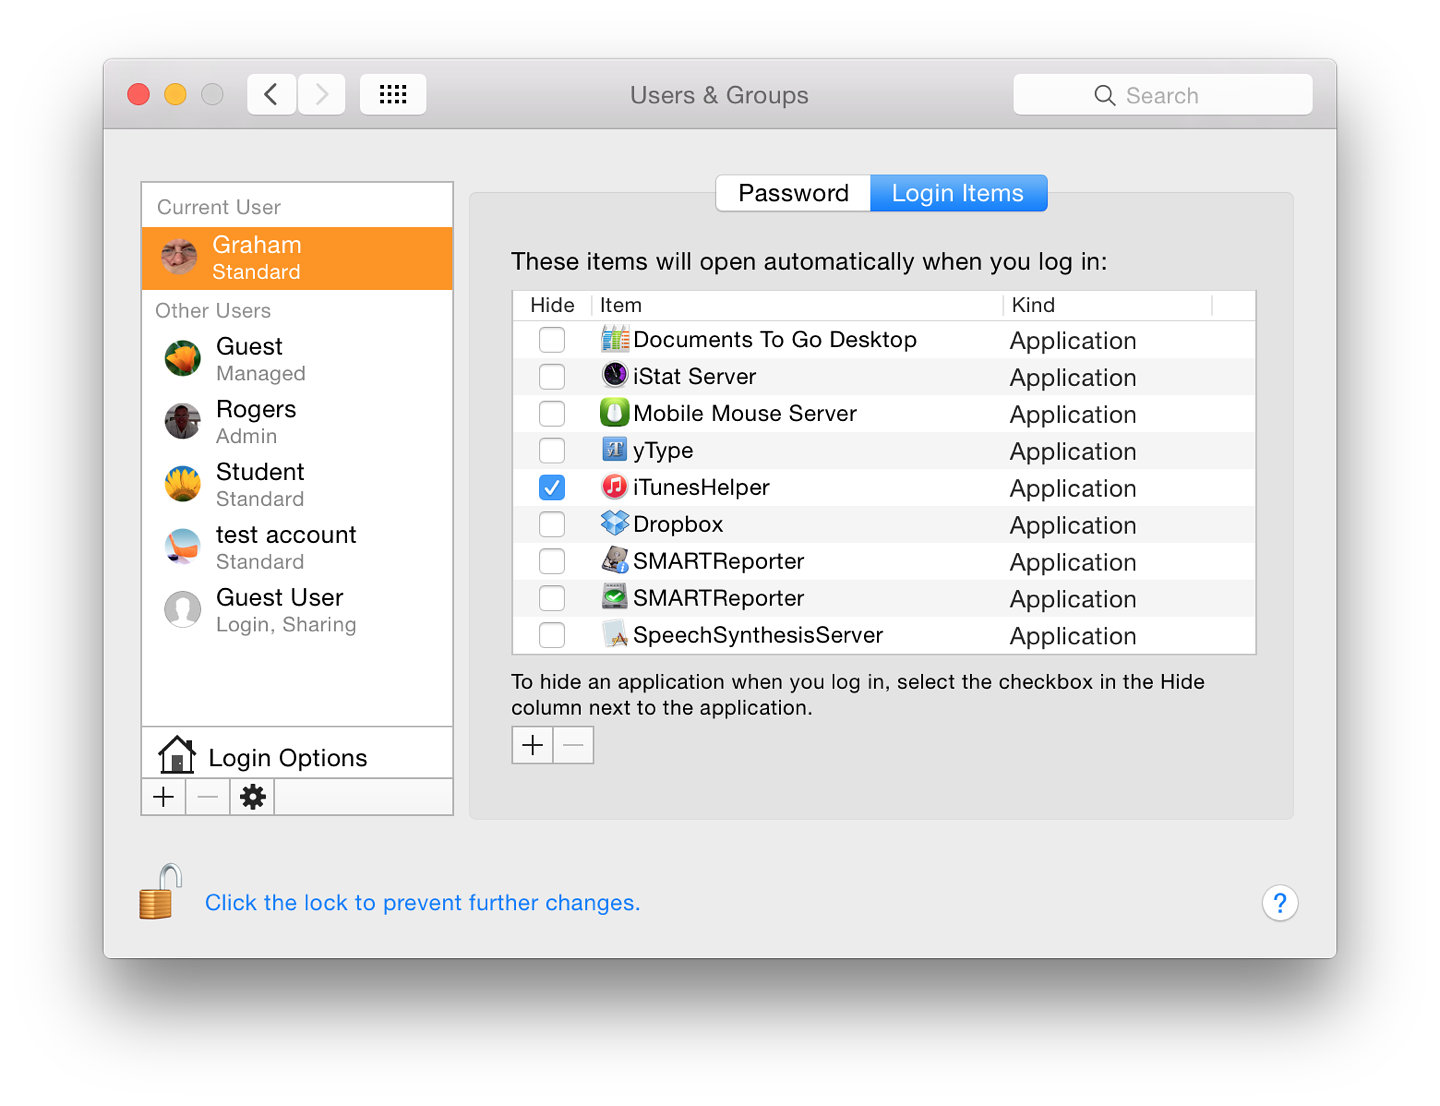
Examples of Applications set to load at Login
Notes
A group account gives the same privileges to two or more members and when specific file access privileges are assigned, all group members share those privileges. This is intended to help when sharing files or using shared folders.
We may add a group (once it has been created) by highlighting a file and choosing Get Info (Command + i). File permissions are at the bottom of the panel revealed and when the padlock icon is unlocked, users may press the + icon to add a user or group and set permissions for the added user/ group.
When adding accounts, users should not usually have more than one Admin account to avoid confusion. However a second Admin account can easily be setup temporarily for trouble-shooting. It may be removed after the problem is solved.
When installing some applications, a user is given the option to make them open at login. This may also be selected by highlighting an icon in the Dock and selecting Options. Users should be aware that too many items, or items with a large CPU/memory requirement (such as some suites) may be a drag on resources.
Login items may also be the cause of conflicts that are not easy to track down. Starting a computer in Safe mode (with the Shift key pressed) does not load these items and this may be a way to track down problems that are being caused this way.
Users are strongly urged to use a password - and preferably one that is strong - with random characters. Using Password Utility (above) can create a strong password but this may be hard to remember. In this situation I write the password on a piece of paper which is locked away in a drawer. An easy to remember password may also be easy to break or guess.
The Open Directory Server "stores and organizes information about a computer network's users and network resources and which allows network administrators to manage users' access to the resources" (Wikipedia) and is an Apple solution.
See Also:
Graham K. Rogers teaches at the Faculty of Engineering, Mahidol University in Thailand where he is also Assistant Dean. He wrote in the Bangkok Post, Database supplement on IT subjects. For the last seven years of Database he wrote a column on Apple and Macs.
|


 If the new account is to use a separate password, there are two panels for the characters to be entered (password and confirmation). To the right of this sub-panel is a small key icon, which brings up a utility that can help a user select a password from the simple to highly complex (see below). A color bar indicates a security rating from red (poor) to green.