Cassandra: OS X and Maintenance - Reactions to an Online Query

AMITIAE - Sunday 18 October 2015
|
Cassandra: OS X and Maintenance - Reactions to an Online Query |
|
|
|
By Graham K. Rogers
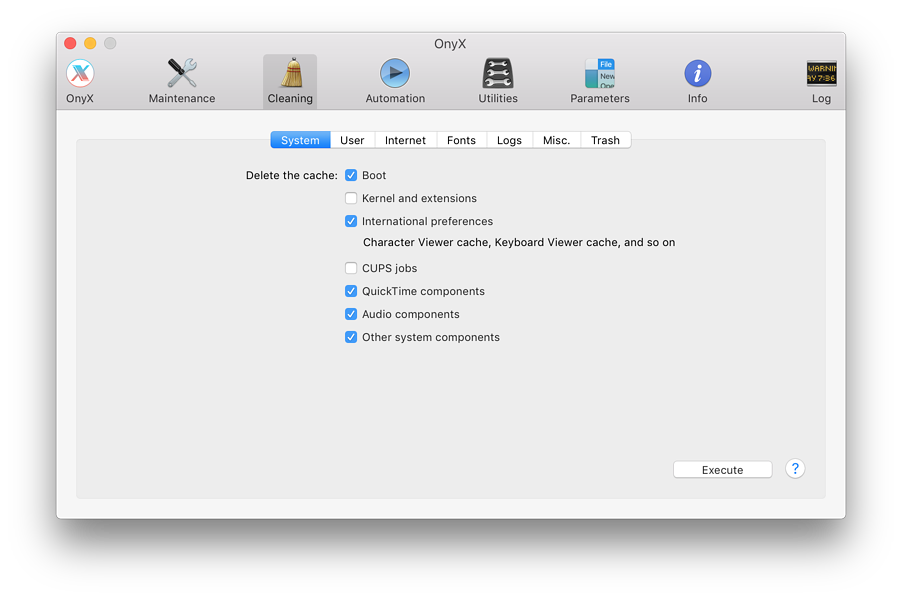
Onyx is developed by the French, Titanium Software, and there are specific versions for different versions of OSX. It is free, but the developers of course ask for donations. As well as some maintenance, it can turn on certain hidden functions in the Finder: be careful what you wish for. It may be easier to run this from an Admin account: Admin authorization is required when it is opened in a User account
Yasu is no longer being developed and it is an "at your own risk" option.
Cleaning out the other caches manually needs more than a few steps, working in the Finder and access to User caches and system cache: this is why those utilities are available.
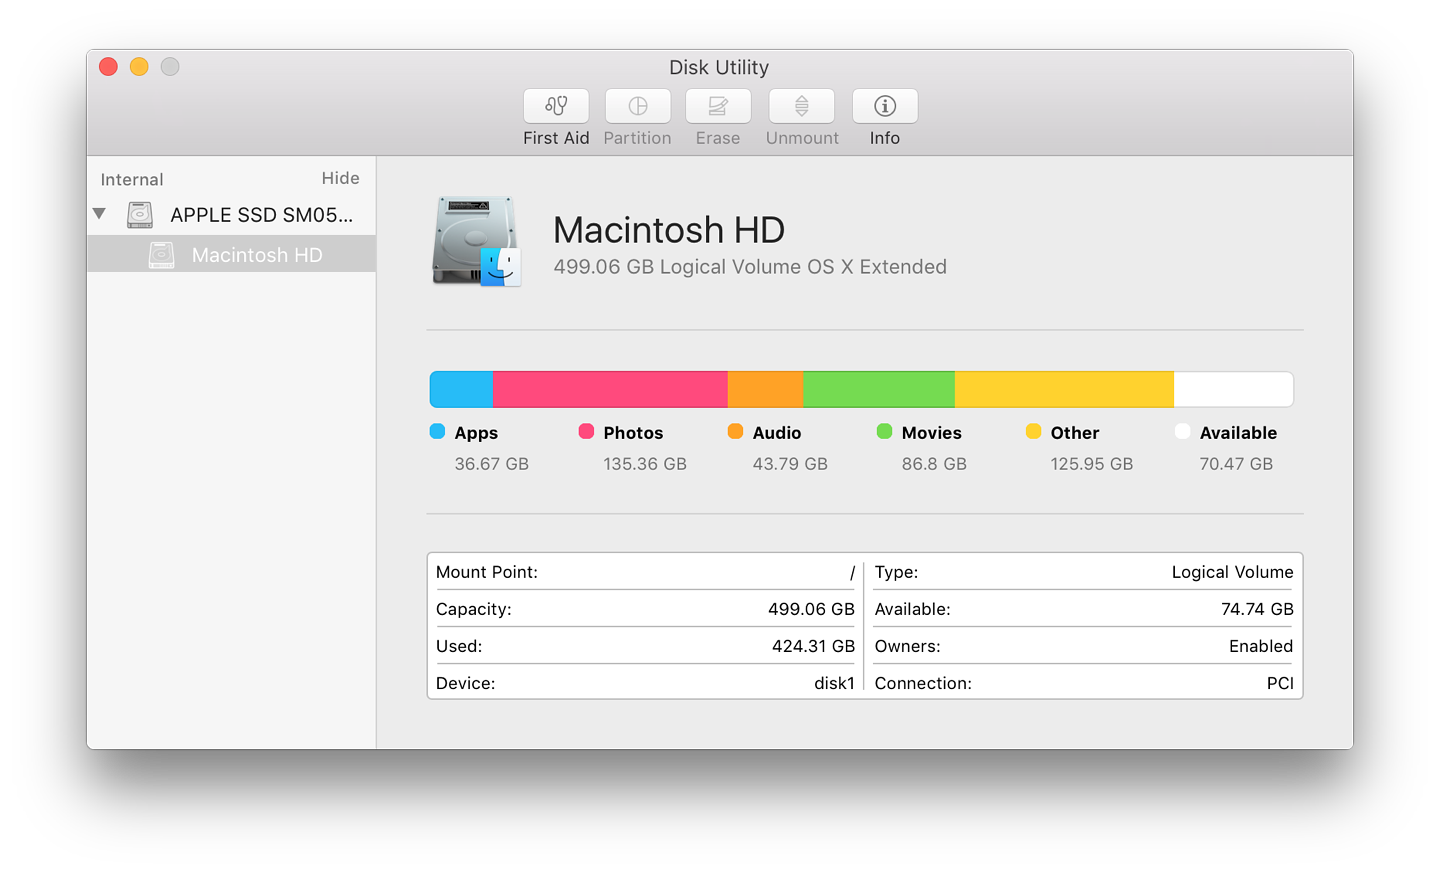
Deleted files, particularly photographs, may not always end up in the Trash right away, however. In Aperture, which I use often, there is both Trash and Rejected images. Before the Rejected images appear in the Trash, they must be marked for deletion; and the Aperture Trash must also be emptied (using the Aperture menu). That Trash then appears in the Finder Trash which can then be emptied as normal. This may often release much space. The new Photos app has a similar fail-safe delete feature. Instead of removing deleted images as soon as the user hits the Trash icon, these are stored in a album (with other Photos albums), marked "Recently . . ." with a Trash icon alopngside. These images are kept for 30 days. he number of days remaining is shown below each image (or each batch). The images may be recovered, marked for immediate deletion; or the user may delete all. These do not appear in the Trash, but some space should be made available on the disk, particularly if the user has opted to store images in iCloud and on the device. A sure way to recover some space is to restart the computer. I tend to run for several days at a time just using sleep and a few gigabytes magically appear when I do restart.
Single-User ModeI like to think of OS X as Unix with a pretty face. Underneath the graphical interface is an operating system first developed in the 1960s at Bell Labs. I had to use Unix commands when the internet first appeared. It was not a particular problem as in those days, MS DOS also needed command line work. For those not familiar with typing in such commands, this is scary. For anyone who has used this, it cuts some corners.Start the computer holding down the Command + S keys. This is Single User Mode. White text on a black screen appears. To see what this looks like, I suggest a test with Command + V first. This is Verbose mode: we can see the Unix, then OS X starts normally. In Single User Mode, we can enter commands and make many dangerous changes, but also some quick repairs. This is particularly useful if there are no alternatives (as when users make certain changes that lock them out - it happens). In this instance, all that needs to be done is to enter the command
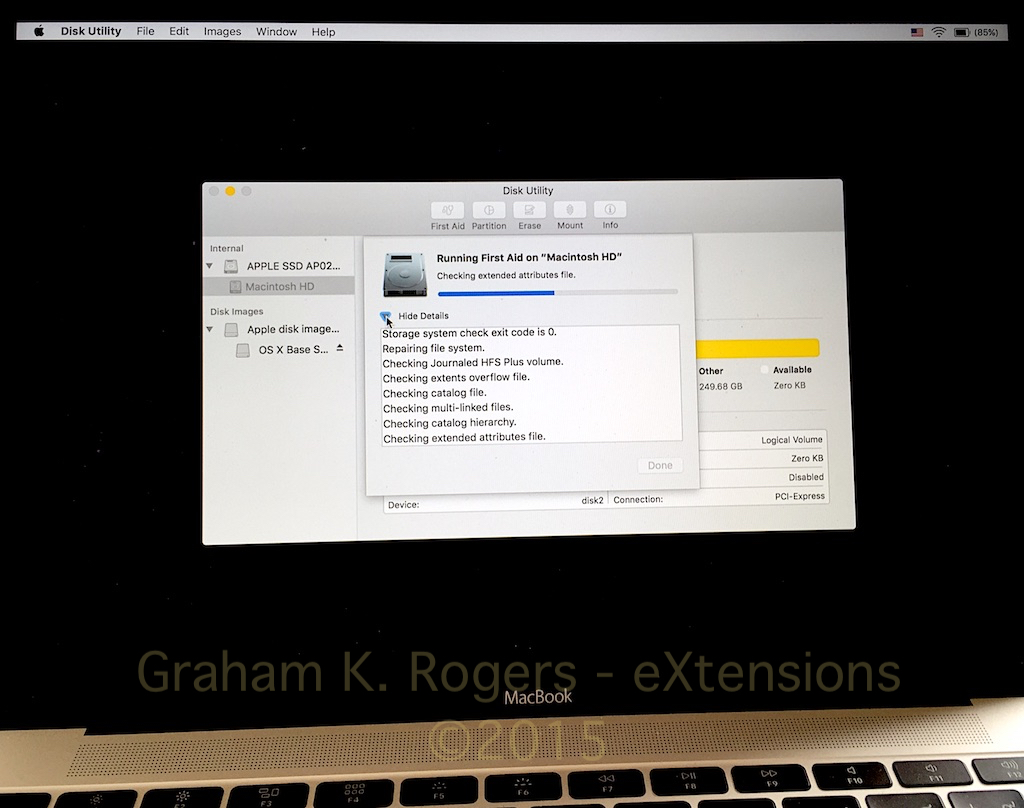
The disk will be checked and the parameters being examined appear on the screen. These are the same as when using Disk Utility to repair a disk. At the end, the system should report that the disk "appears to be OK" - the highest praise. Sometimes, repairs are made (automatically) and the utility runs again. In that case, my preference is to run it one more time. When all is done and the disk really is OK, type in
and OS X should start up normally.
External MediaFor those who have installed a version of OS X on external media, such as a flash drive or hard disk, connect that device and start the Mac up while holding down the Option key. That will show all disks that are available to run OS X. Select the right disk (depending on its name) - many of my students have flash drives with the name, "Untitled", so that is easy to spot. I give my disks other names. Disk selection is made using Left/Right arrow keys. Press enter, and the startup will begin.The speed of the startup will depend on the medium and connection. Flash drives are slow; an SSD connected via Thunderbolt will be much quicker. When the system has started, the interface should look the same as that on the Mac, depending on the version of OS X installed. After login it will behave as if you are working on the Mac, but the hard disk of the Mac that needs to be repaired is not mounted. Disk Utilities is in the Applications > Utilities folder and is run in the normal way, but in the sidebar showing the disks available, the Mac disk will be lower down. By clicking on that and highlighting the disk, it will be possible to use First Aid to repair the Mac's disk.
Starting from a Second MacSince OS X was first available, Macs have had a feature called Target Disk Mode. This turns a computer into a "slave" of a Mac it is linked to, using Thunderbolt, Firewire or USB, depending on the Macs. It is possible to link a Thunderbolt cable to an older computer that only has Firewire (and vice versa) using an adapter. USB may not work with all Macs (see recent comments from Glenn Fleishman on Macworld).There are two ways to startup in Target Mode: using System Preferences > Startup Disk; or holding down the T key at startup. In both cases I prefer that the master computer is already running and the cables are connected. The Slave computer will display only a coloured screen with a connector (e.g. Firewire) icon. All the work is done from the Master computer, in a similar way to working from external media (above).
Start up Using the Rescue PartitionAlthough the Rescue partition has been with us since OS X 10.7, there are still some who are unaware of this. I realised this with the online chat earlier in the week, when it became clear that this was something totally new for the user. Despite the amount of online information available on OS X, my experience with many is that they break Rule One - It ain't Windows - and wonder why things go wrong. If these same users are unaware of the repair facilities available, some help is needed.The Rescue partition is an extra installation that allows us to start up and repair the main partition: the one we usually work on. Not only are there several utilities available, but it is possible to restore the user's installation from a Time Machine backup; to download and install a new version of OS X from this facility; and to access online help.
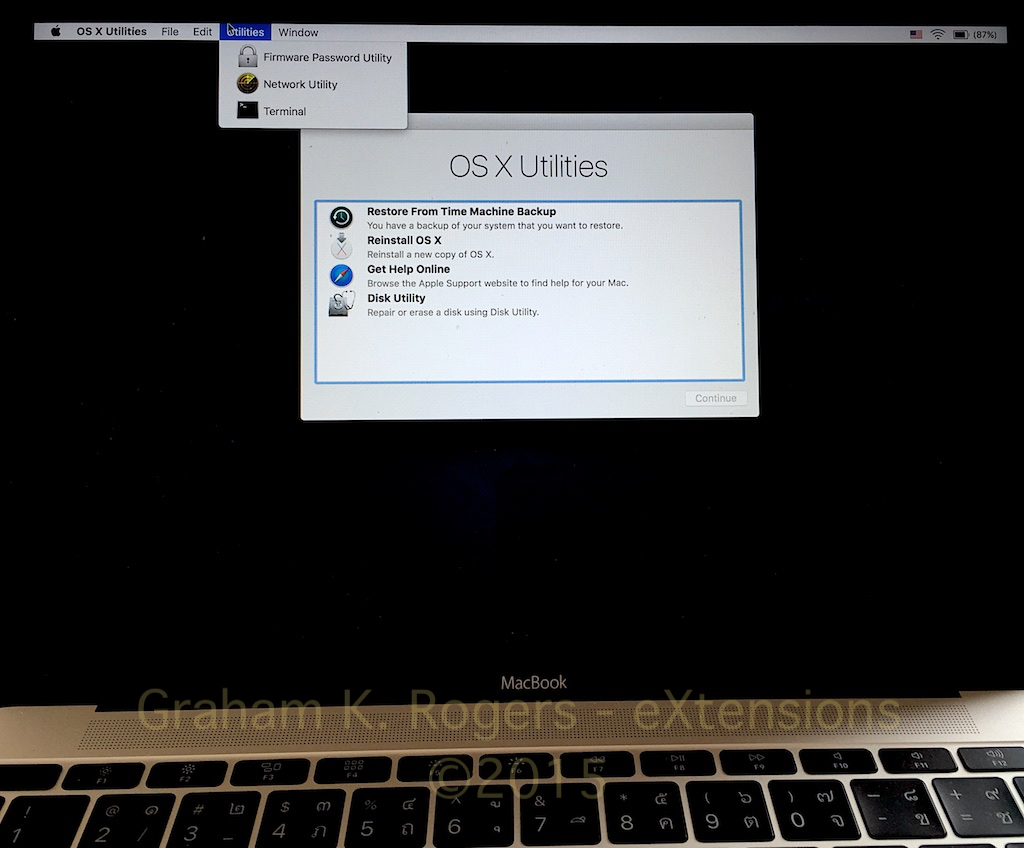
To access the Rescue partition, the Command + R keys are held at startup. This opens a screen with the four options above. Disk Utility is in Utilities. To start this highlight the item in the panel and press the Continue button, bottom right. [Some other tools that may be useful: Firmware Password Utility, Network Utility and Terminal can be opened from the Utilities menu at the top of the screen.] The panel that opens seems identical to the Disk Utility available in El Capitan and works in the same way: select the specific disk that needs to be repaired and press First Aid. A panel appears to confirm that the user really does want to run First Aid. The processes are hidden by default, but may be seen by pressing a small triangle to open a panel. At the end, if all is OK, the user will press Done and quit the utility via a menu item (or Command + Q). This returns the display to the opening panel.
CommentsRegular maintenance, including running repair utility from time to time are essential to keeping any computer in the best condition. Little problems can soon develop into large problems, but like some virtual iceberg, we never see what is happening below the surface. The computer may appear to be running fine, but then something starts to misbehave and the problems begin.I am often asked about stronger utilities and while some favour Micromat's TechTools Pro ($99.99), my preference has always been for Alsoft's Disk Warrior ($119.95) which now comes on a USB drive. I examined this at length in February in a series of 5 articles. I use this often: not because there is anything wrong (as far as I can see) but as a form of preventive maintenance. As for the pricing of both of these: how much is your disk and its data worth?
Graham K. Rogers teaches at the Faculty of Engineering, Mahidol University in Thailand. He wrote in the Bangkok Post, Database supplement on IT subjects. For the last seven years of Database he wrote a column on Apple and Macs. He is now continuing that in the Bangkok Post supplement, Life. |
|

For further information, e-mail to
Back to
eXtensions
Back to
Home Page


 Some suggestions for basic cleaning (particularly of caches which may slow OS X down) would be Onyx, Cocktail and Yasu. These do similar tasks but are not identical (Yasu is no longer supported). They are not available on the Mac App Store, so installing and running may need the user to insist: use the Control Key when an app like this is first opened and confirm that this is what you really want. Apple's walled garden can be hard, but I would rather be safe.