System Preferences in OS X 10.9, Mavericks: Displays (Updated)

AMITIAE - Tuesday 29 October 2013
|
System Preferences in OS X 10.9, Mavericks: Displays (Updated) |
|
|
|
By Graham K. Rogers
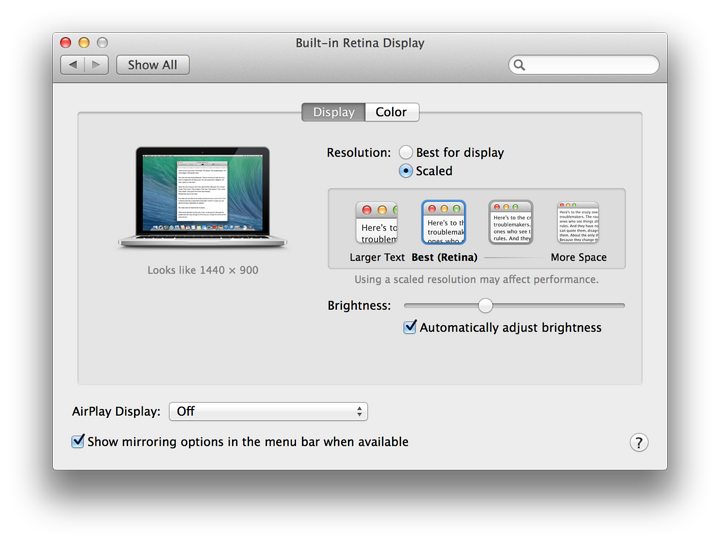
DisplayThe Display pane appears similar to that in previous versions of OS X. As before, icons for the specific displays being controlled (internal or external) are used. On my computer, for example, the icon for the LCD display panel clearly shows a MacBook Pro, right down to the "MacBook Pro" characters, the black screen surround, the infrared detector and the iSight camera (you have to look hard).
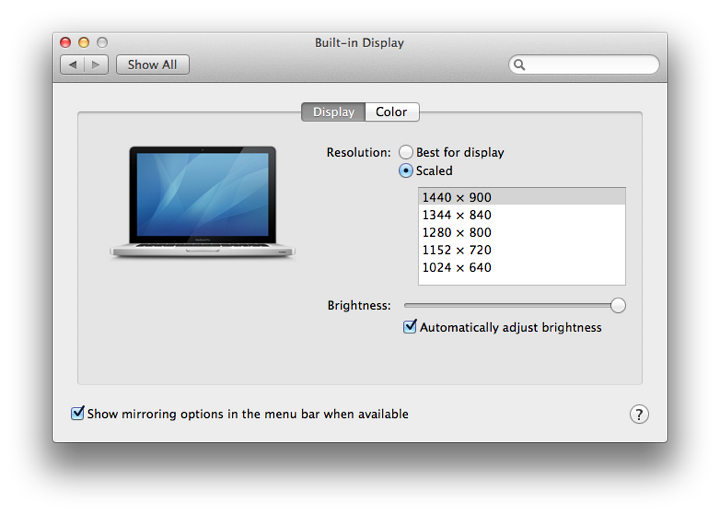
"Best for built-in display" is for users who will want to leave well alone and will be content with the setup as provided. When this is selected, there is only a slider for Brightness and a checkbox below this, marked "Automatically adjust brightness." It is still possible to use the slider when the box is checked. When the Function keys (F1 and F2) are used, the slider also moves.
Pressing the Option key will show a "Detect Displays" button at bottom right on some Macs.
At the bottom left of the panel is a checkbox marked Show mirroring options in the menu bar when available.
I was sent a tip (and a correction) by Sebastian Kempgen of MacCampus, in Germany, who suggests that holding down the option key and then clicking on "Scaled" will show the missing resolutions from previous versions of OS X. He adds, "Most importantly, it brings back the standard setting of 1024 by 768 for use on external projectors" so users may set correct resolutions before connecting to a projector.
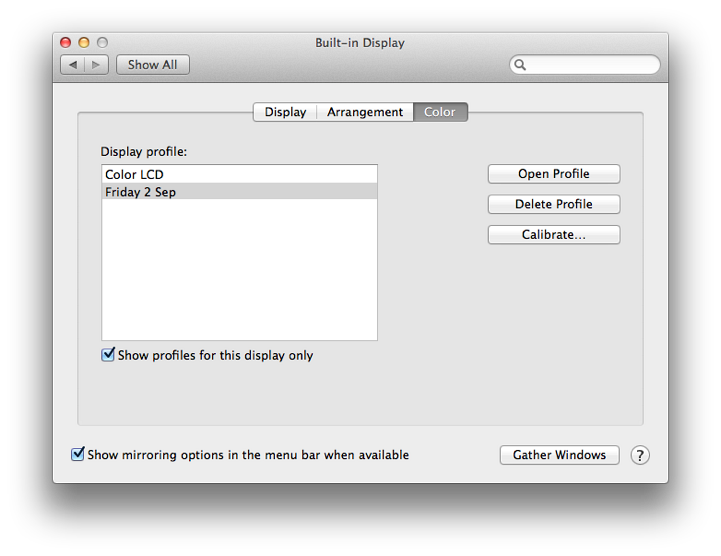
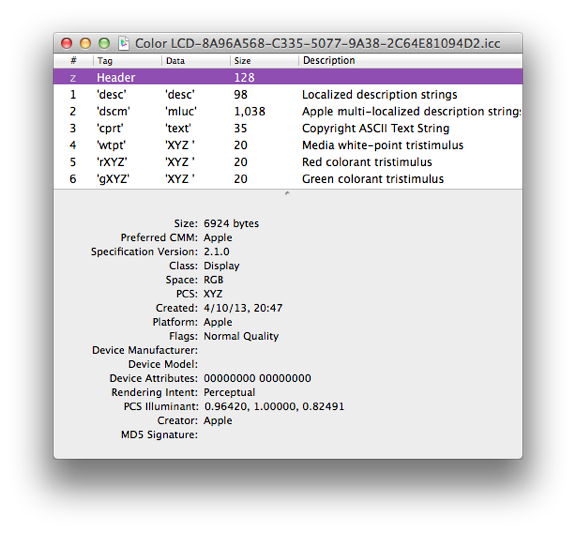
ColorThe pane marked Color is to show and if necessary add or change any color profiles by way of calibration. Most home users will not need this, but for imaging professionals this ability to calibrate displays is critical. While professional photographers or print houses may need to check calibration regularly, they will have specialist knowledge and equipment to assist with this.There is a warning here: if you are not sure, don't touch.

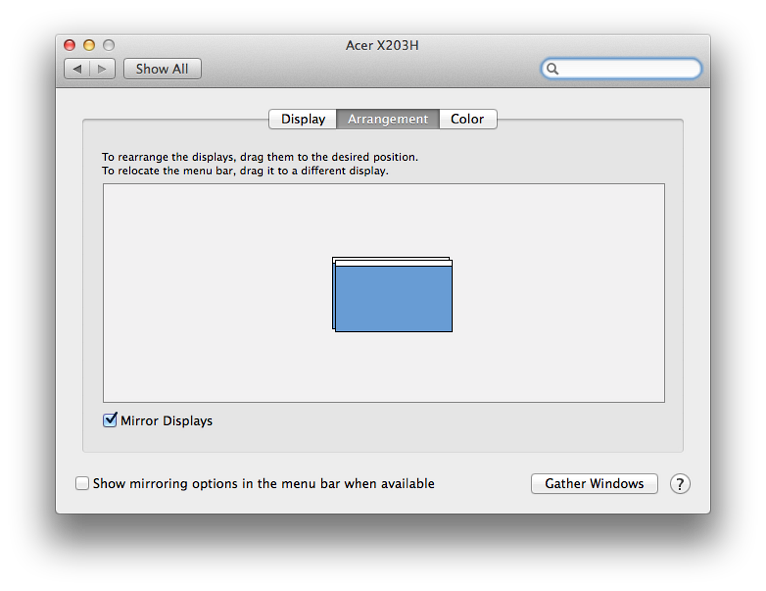
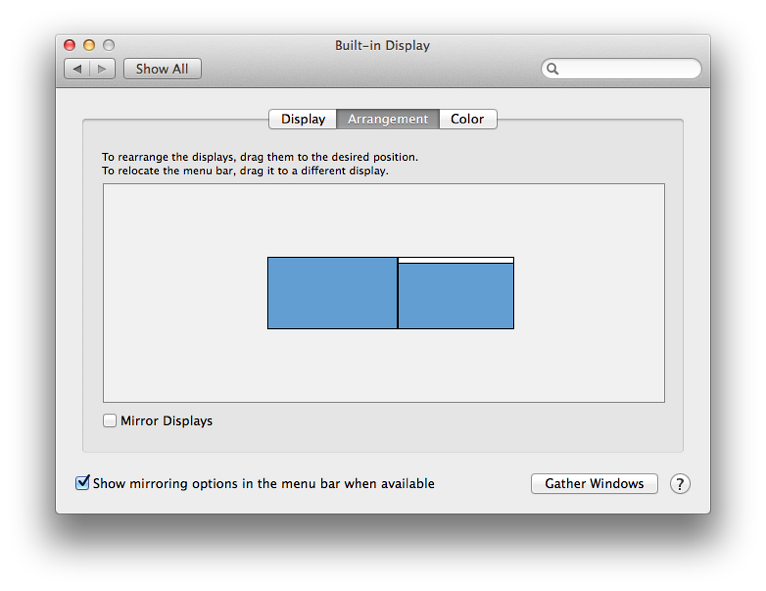
ArrangementWith Macs it has always been possible to set up the way an external monitor displays information, either by mirroring the main display (a clone) or a side-by-side setup. I normally use this for presentation of information in a classroom, using an overhead projector. Relative to the main display, the second one may be positioned not only to the left or right but also above or below. This may be imagined by moving the cursor to the right edge of the screen (for example) and then seeing it appear on the left side of the second display.When displays are mirrored, the information on the screen is identical (See also information, below, and Mission Control).
This feature is especially useful when editing photographs or movies. It is also used with presentations: with Keynote the user's screen can have a Presenter Display which shows current and next slides, along with elapsed times and presenter notes. This is also available in PowerPoint for Macs. Mission Control has a new option for displays to have separate spaces (see notes below).
Depending on which of the displays is selected as the optimal choice when Mirroring was on (Mac or external) an "Arrangement" pane will be added. In my case, when the Acer monitor in my office was shown on the "Optimize for" button, that panel had the three panels, while the Mac had the original Display and Color panels. When mirroring was off, the resolution adjusted itself to the best for the respective display, so while the MacBook Pro was running in its optimum 1440 x 900, the Acer display was at a 1600 x 900 resolution.

By clicking on the white Finder bar at the top of the blue Window shown in the preferences display it can be dragged to another of the windows shown. With this, the window on the external display may become the main (Finder) window (see above).
With this, I am able to turn the display through 90, 180 and 270 degree options which may be useful when certain displays are used or some images need to be shown at different angles.
Comments on Displays in MavericksSo far I am not finding that there is total consistency in the way the displays work when not mirrored. For example, the Dock may not react instantly when the main display is changed between external and Mac displays. There is a delay of around 10 seconds before it decides to appear.Also, particularly annoying for me was the behaviour of Keynote (iWork): both the previous version and the latest one that was released at the same time as Mavericks. To have the Presenter display appear on the Mac, the main keynote page has to be moved to the external display before starting the presentation. Only then is the presenter display available on the Mac. Before when the presentation was started, the slides were shown automatically on the external display with the presenter display on the Mac. There are no preferences in the new Keynote for Primary and Secondary displays. However, there is a related checkbox in Mission Control, marked "Displays have separate Spaces" which was on by default on my MacBook Pro. When the box was unchecked, using displays that were not mirrored, the presenter display was on the MacBook Pro with the slides displayed on the external display (as in previous versions of OS X). There is no button in the Displays Preferences linking this to Mission Control preferences.
Update - New MacBook Pro 13"With the arrival of a new 13" MacBook Pro, I checked System Preferences and found a major change in the way this panel works with the "Scaled" settings. Instead of a list of resolutions, there is a series of panels: larger text (1024 x 640), Best (Retina), Looks like 1440 x 900, and Looks like 1680 x 1050. The last gives a really small, but clear display, allowing more information to be displayed on a screen. The icon displayed for the Mac is brighter as well, reflecting the way that this Mac works with Mavericks.
See Also:
Graham K. Rogers teaches at the Faculty of Engineering, Mahidol University in Thailand where he is also Assistant Dean. He wrote in the Bangkok Post, Database supplement on IT subjects. For the last seven years of Database he wrote a column on Apple and Macs. |
|

For further information, e-mail to

|

|

 On the external display panel on my computer, I also have a Rotation button. I added this some time back using a Terminal command in the main panel (see below), but it is now only shown when a suitable external monitor is attached.