eXtensions - Wednesday File: System Preferences in macOS High Sierra: Accessibility (3) - Interacting (Dictation, Siri, Keyboard, Mouse & Trackpad, and Switch Control)

eXtensions - Wednesday 11 October 2017
|
eXtensions - Wednesday File: System Preferences in macOS High Sierra: Accessibility (3) - Interacting (Dictation, Siri, Keyboard, Mouse & Trackpad, and Switch Control) |
|
|
|
By Graham K. Rogers
As each item in the left side window is highlighted, so controls are shown in the main panel. At the bottom of every pane is a single checkbox: Show Accessibility status in menu bar. With the number of items in Accessibility, I have split this into three sections. Part 1 covers General and Vision. Part 2 examines Media, and Hearing, while Part 3 (here) covers the more complex Interacting using Dictation, Siri, Keyboard, Mouse, and Switch Control panels.
InteractingThe section named, Interacting, has been available since OS X 10.8, Mountain Lion. In Mavericks a new option of Switch Control was added. Dwell Control was added in Sierra but those features are now absorbed into the Keyboard section. The panels in this section are now: Dictation, Siri, Keyboard, Mouse & Trackpad, and Switch Control.
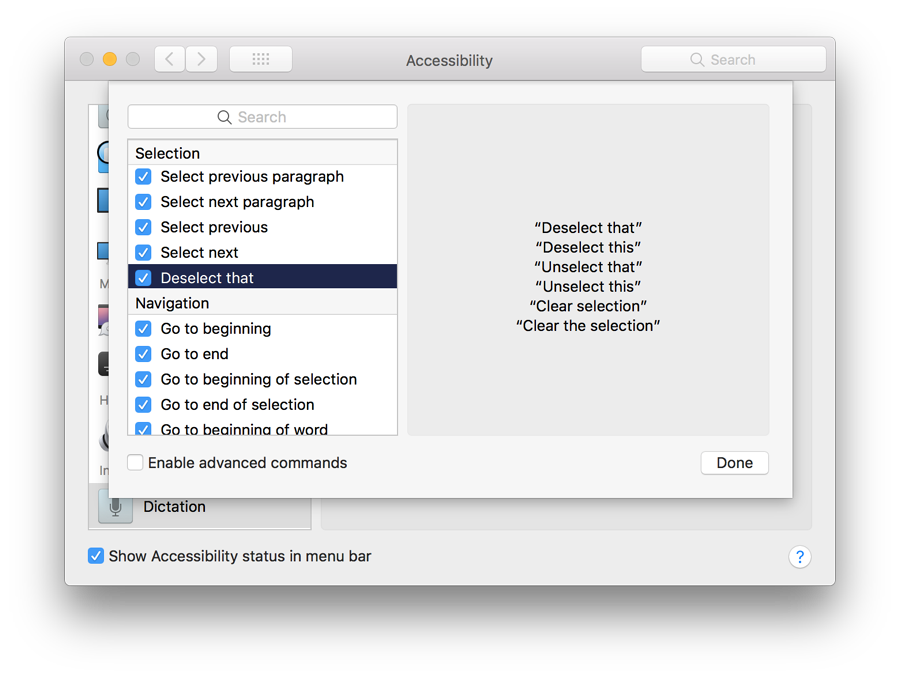
After an outline description of the purpose, there is a button marked Dictation Commands.
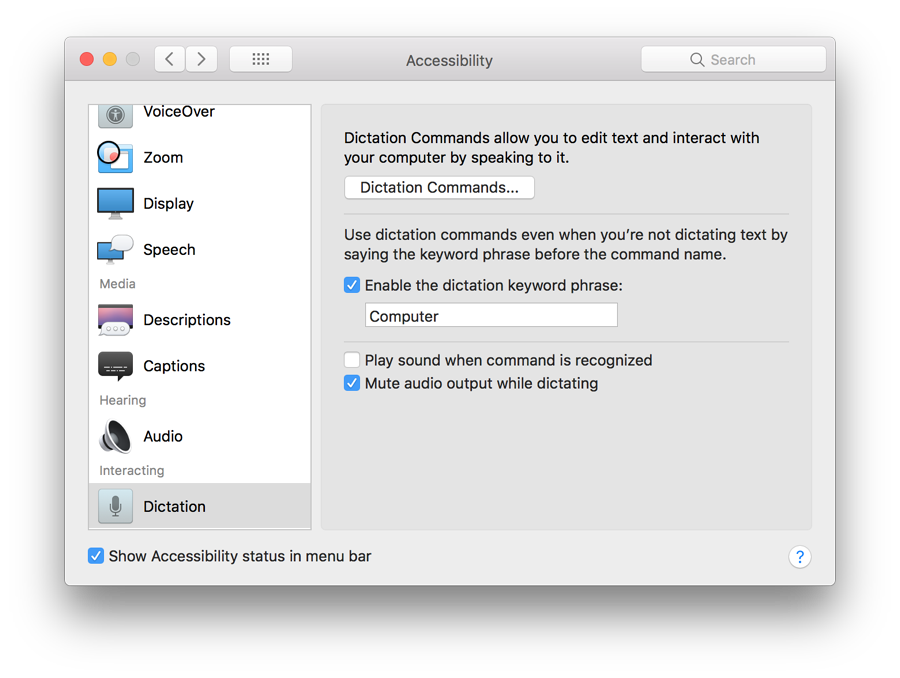
A list of possible verbal commands is shown when the button is pressed. Users may also add their own. Languages are available, depending on the specific installation (mine has United Kingdom English, US English and Thai).
A dictation keyword is available when a box is checked below the Dictation Commands section. The default word to begin dictation is "Computer" but this can be changed. When the box is checked, a microphone icon appears in the menubar and this will display a menu when clicked:
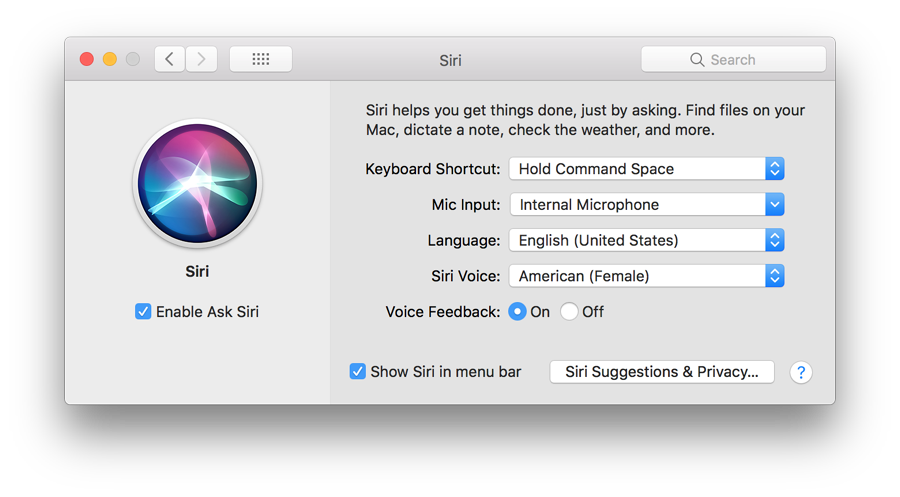
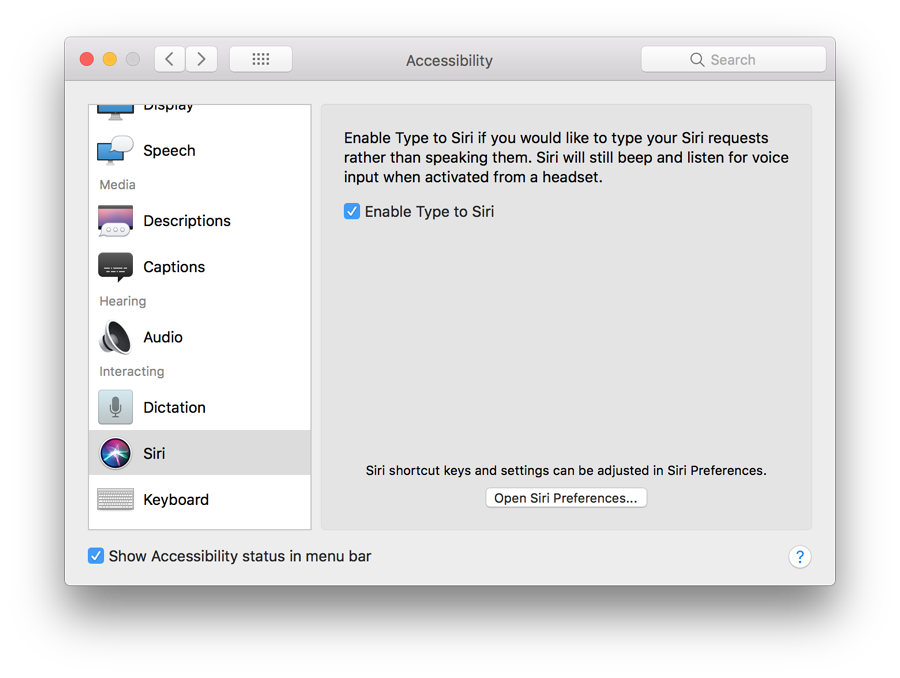
Siri Preferences panel Siri is a new section in the Accessibility section and works with the Siri preferences, although here the focus is on use of the feature for those with speaking difficulties. A single checkbox is shown to Enable Type to Siri. Above this there is a description of the feature which does not over-ride the voice input from a headset. The input is from a keyboard rather than spoken.
Siri option in Accessibility Preferences
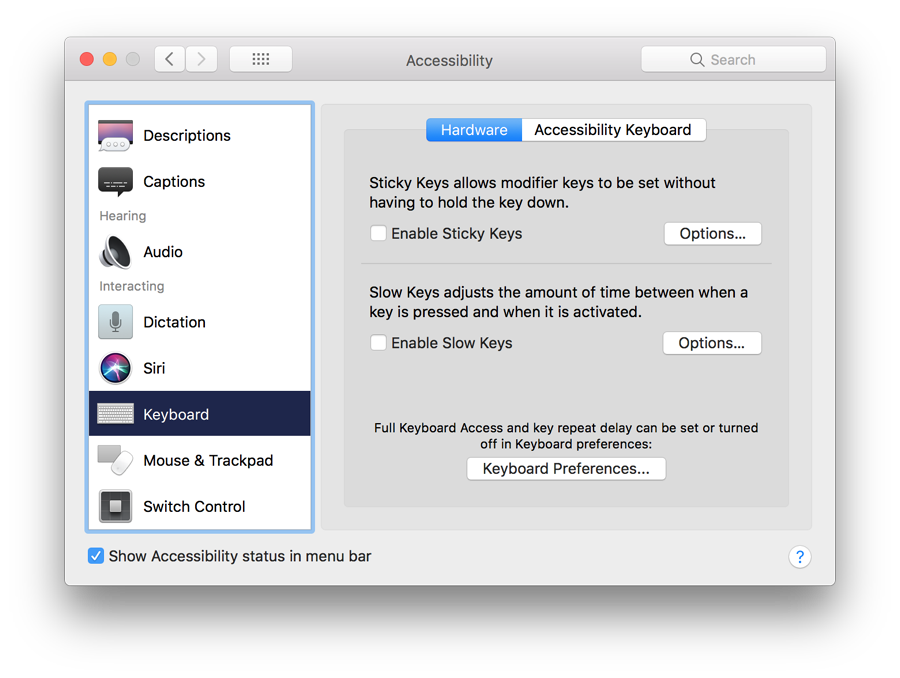
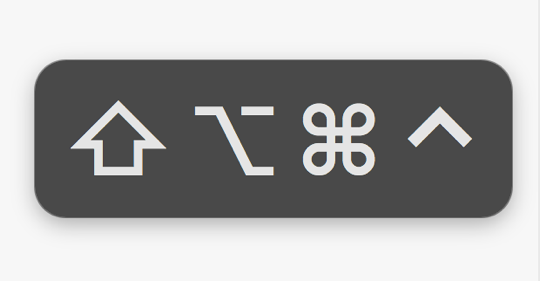
With Sticky keys the last-selected modifier key - those used in combinations, like Command or Control - remains active. When turned on (or when a modifier key is pressed) the computer makes a sound. Another sound is made when the feature is turned off. Pressing the key a second time, highlights it (with an optional sound), and pressing a third time cancels the key.
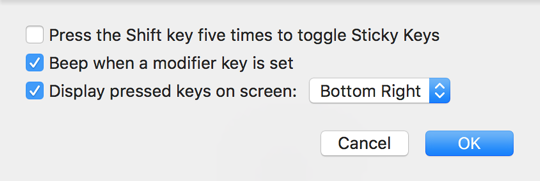
A second checkbox marked "Beep when a modifier key is set" is slightly misleading: the sound is more like a mechanical "clunk". A third checkbox allows display of keys. The placement of the icon that appears may be selected with options for top, bottom, left or right of the screen. If this option is selected in that panel, sticky keys will activate even when the option on the main pane is unchecked: pressing the Shift key five times enters the checkmark in the box. Slow Keys adds a delay for those who have difficulties with initial or repeated keystrokes. Rather than simply tapping a modifier (or other) key as in touch typing, the key needs to be held down. There is a short mechanical sound when the key is pressed and another when it appears on the screen. An Options button reveals a slider allowing the acceptance delay to be adjusted, so those with disabilities that make typing very slow can be accommodated. Simply pressing the key one time will produce a sound, but no effect. Depending on the position of the slider, a key needs to be held for a moment before anything will appear on the screen. To access more features, there is a button here that opens the Keyboard preferences where full keyboard access and key repeat delays can be set or turned off.
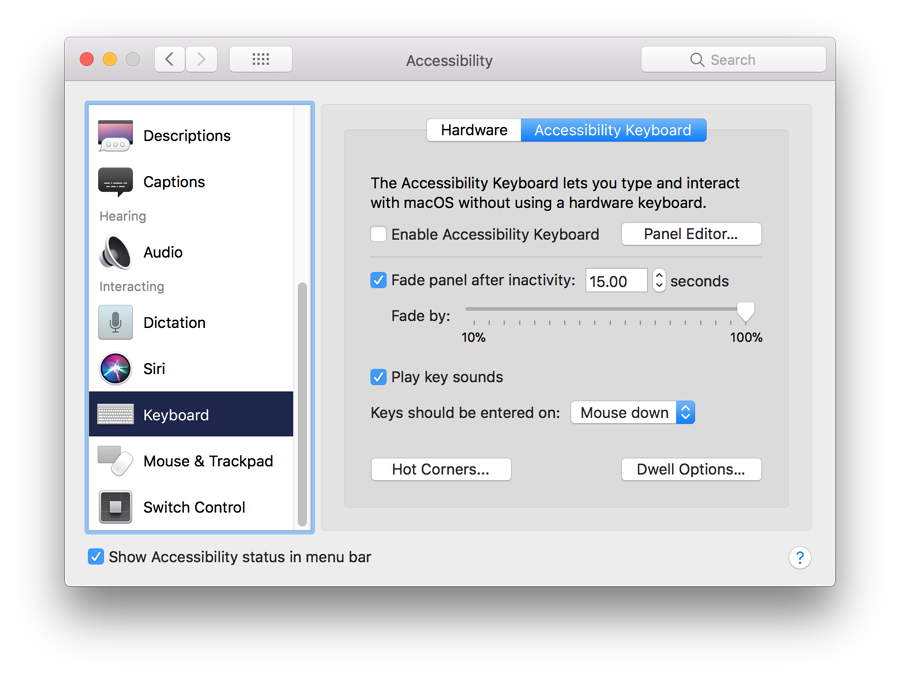
When this is in use a keyboard appears on screen and this can be used to type in characters. There is also predictive text: suggestions for words. Below the predictive entries are controls for hardware and software features (brightness/dim, volume) and Function keys when the Fn key is pressed. Above the suggestions on the left are an X to close the panel; a minimize control; and to the right a settings icon to control other features (Zoom, Transparency, Dwell actions, Customize, and Preferences). The feature is controlled by three checkboxes:
Below the three checkboxes is a button that controls when keys are entered. Options are: Mouse down, or Mouse up. With a trackpad this was not necessary.
Hot Corners are specific to this Accessibility feature and are not related to Hot Corners in Desktop & Screen Saver preferences. Those available here are: Hide/Show Home Panel, Toggle Dwell Pause, Left Click, Right Click, Drag and Drop, Scroll Menu, Options Menu. These are only available when the Accessibility Keyboard is turned on.
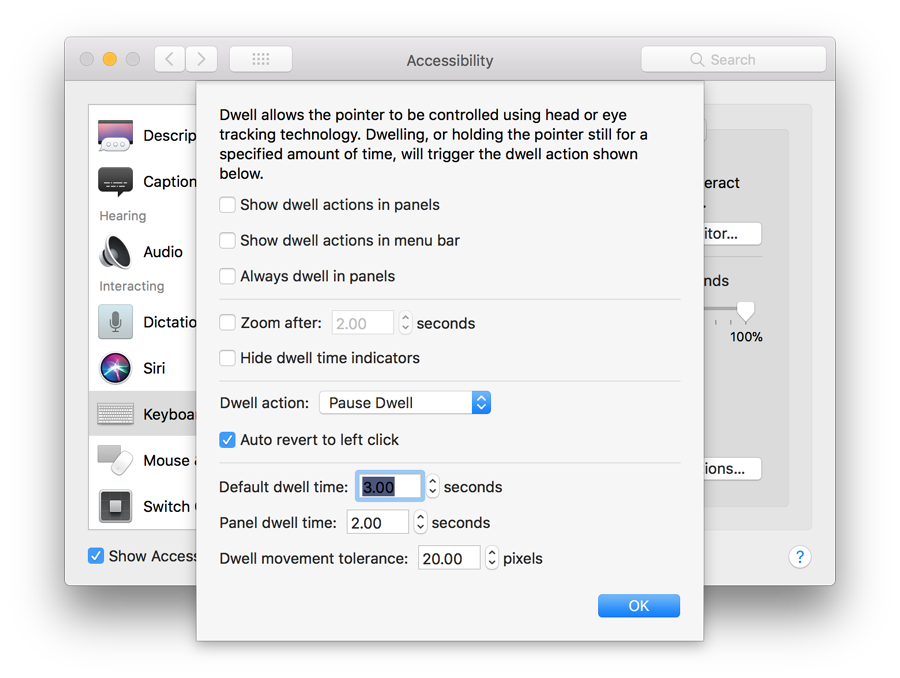
Dwell Options are used by eye-tracking technology. Holding the pointer still for a specified time triggers an action. Those available are: Show dwell actions in panels; Show dwell actions in menu bar; Always dwell in panels; Zoom after (a box allows the number of seconds to be adjusted); Hide dwell time indicators; Dwell action (Pause Dwell, Left Click, Double Click, Right Click, Drag and Drop; Scroll Menu, Options Menu); Auto revert to left click; Default time (adjustable, 0.25 - 8.00 seconds); Panel dwell time (adjustable, 0.25 - 8.00 seconds); Dwell movement tolerance (adjustable, 0 - 95 pixels).
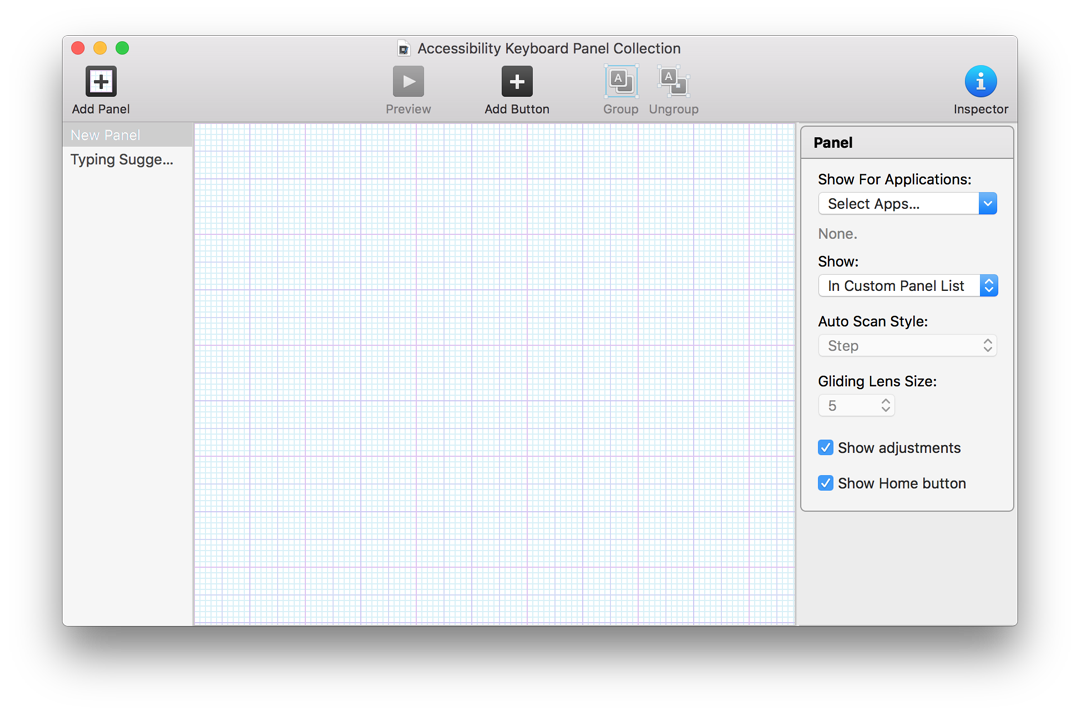
A Panel Editor is avalable for customization of keyboards or creation of other panels that might be useful. Panels or existing keyboards can be edited to add buttons that control actions. The editing panel is fairly comprehensive and several types of panel may be edited. Panels that can be added are Empty, Home - Dwell, Keyboards (ANSI, Alphabetical, ISO, JIS, Numeric), Typing Suggestions. Adding a panel adds it to a list accessible through the Custom button on the ANSI keyboard (to the right of Volume Up/F12). Returning to the ANSI keyboard from a custom keyboard is effected by pressing a Home icon.
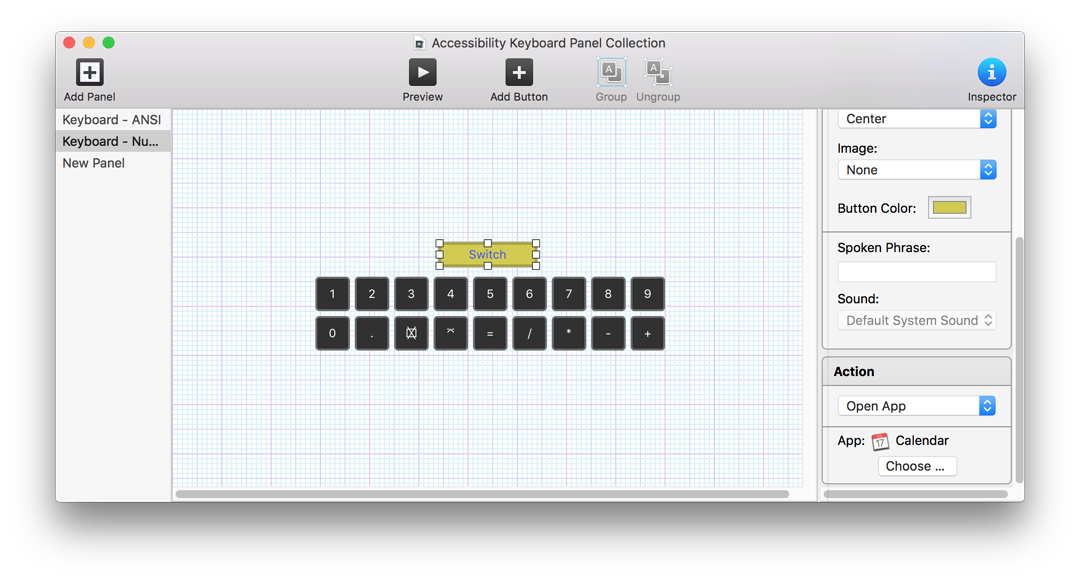
Buttons may be added or customized (color, text) to provide additional actions, such as Go back, Open Panel, Dwell, AppleScript, Enter Text, Presss Keys, Open App, System Event, Typing Suggestions. I was able to add a button to an Alphabetical keyboard that opened an application, but could not do this with the standard (ANSI) keyboard. When customizing, it may be necessary to turn off the Accessibility Keyboard and then re-activate to make any changes active.
On a notebook computer where there is no number pad, upward (and diagonal) movements are controlled by 7, 8 and 9 keys; U and O control left and right movements; J, K and L control downward (and diagonal down) movements and the letter "i" highlights a paragraph (or line). However, when the Mouse Keys feature is used, the normal typing functions of the keyboard are not accessible: not all keys will type characters on the screen.
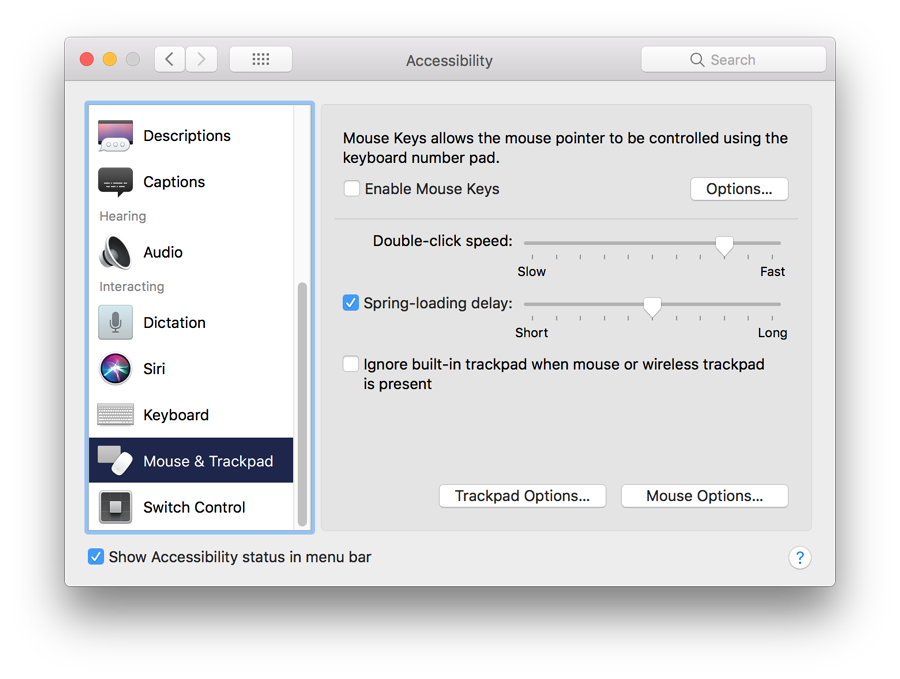
As it is not convenient to keep turning this feature on and off to resume typing, an Options panel allows a checkbox to be used to toggle the feature by pressing the Option key five times. a second checkbox allows the trackpad to be disabled when this feature is used. Also in the Options panel, a slider (Short - Long) adjusts the initial delay of input; while a second slider below adjusts the speed of the cursor movement (Slow - Fast).
Two buttons at the bottom of the panel give access to Trackpad Options (scrolling speed, scrolling and dragging), and Mouse Options (Scrolling Speed). Trackpad Options is not available on a computer without a trackpad.
There is a basic Knowledge base document - HD202865 for Macs, which has an explanation of how these features may be used. A more technical description for Switch Control in Sierra is available in Knowledge Base Document PH25778. There is also information about how Switch Control can be set up on iOS devices (HT201370). [As these are older references (I have only found those updated for Sierra) I would be grateful if anyone has more recent links.]
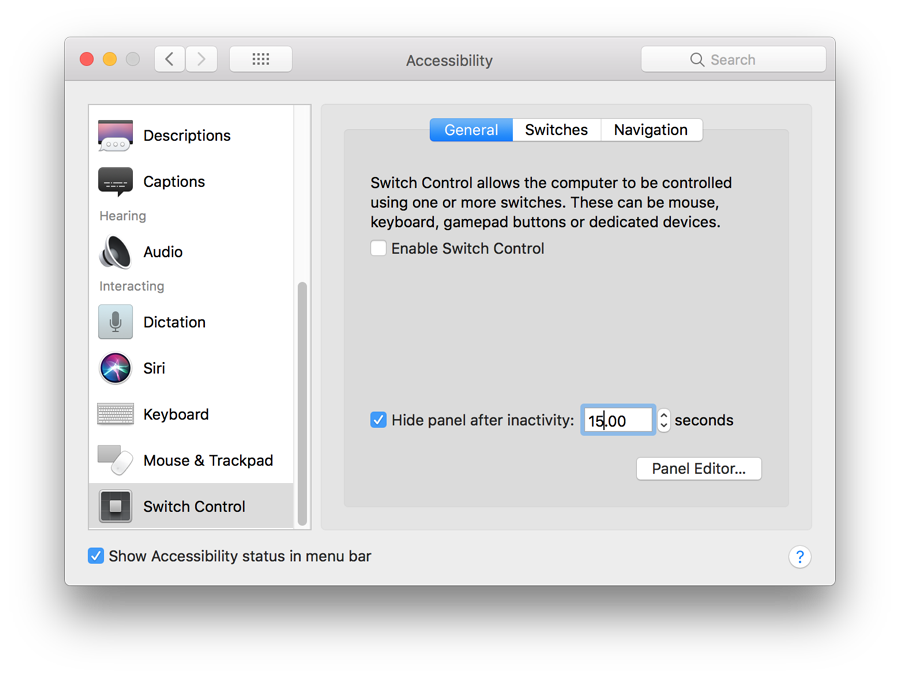
General is a simple panel with two checkboxes: Enable Switch Control; and Hide panel after inactivity, which has a box for entering a time (default 15 secs). A button marked Panel Editor enables a user to add a new device or switch to the system and operate it with specific applications. A developer may add functions to any of the devices or add new devices to accessibility control. Care needs to be taken when attempting to use such features. The panel is almost identical to the Panel Editor in the Accessibility Keyboard panel (above).
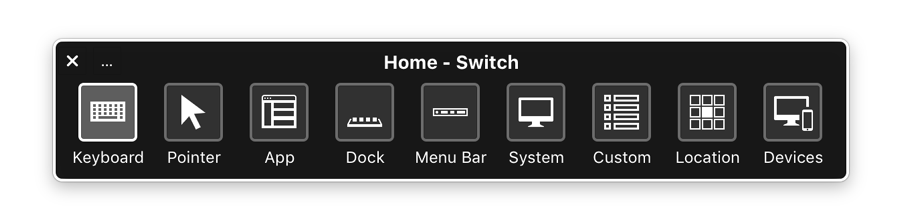
When Switch Control is made active, a panel appears on the screen with a number of controls available: Keyboard, Pointer, App, Dock, Menubar, System, Custom and Location. Pressing any one of them allows a user to control the actions of these input methods. For example:
When the Switch Control pane is displayed, pressing the Space Bar cycles through the options. When the function needed (e.g. Dock) is reached, pressing space bar again selects that. When the space bar is pressed once more, the feature cycles through the item selected (and subsequently down through menus and sub-menus) announcing each item when sound is on.
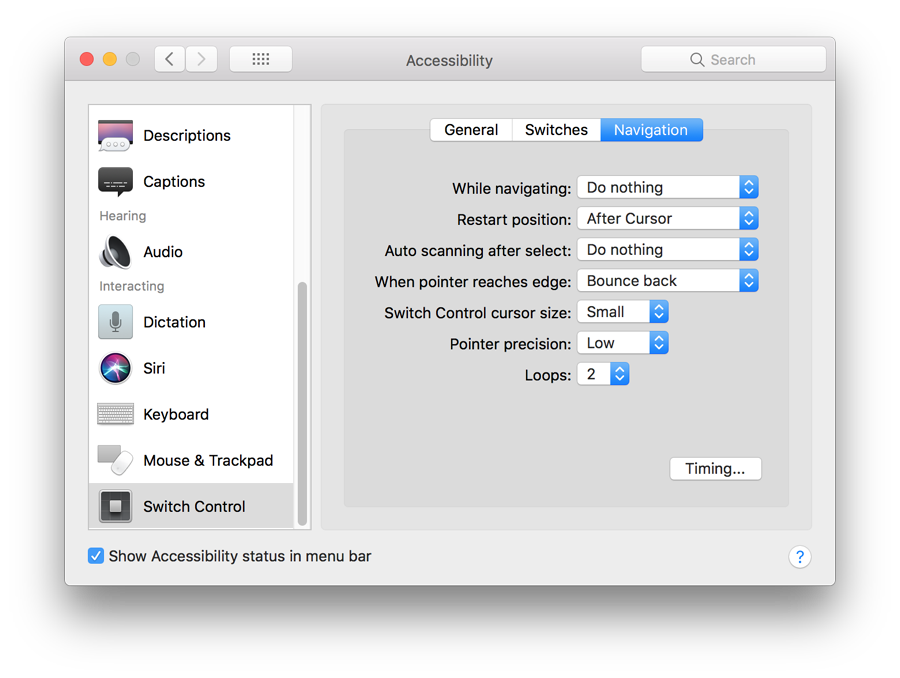
Navigation displays a series of buttons that allow fine-tuning of the way scanning operates when navigating the screen. Operation controls available are:
See also: The Wednesday File (26): Accessibility Preferences in macOS High Sierra (1) - General and VisionThe Wednesday File (26): Accessibility Preferences in macOS High Sierra (2) - Media, and Hearing
Graham K. Rogers teaches at the Faculty of Engineering, Mahidol University in Thailand. He wrote in the Bangkok Post, Database supplement on IT subjects. For the last seven years of Database he wrote a column on Apple and Macs. He is now continuing that in the Bangkok Post supplement, Life. He can be followed on Twitter (@extensions_th) |
|

For further information, e-mail to

|

|
