Breaking-in a New LaCie Little Big Disk: Oops (My mistake) - Recovery

AMITIAE - Thursday 3 April 2014
|
Breaking-in a New LaCie Little Big Disk: Oops (My mistake) - Recovery |
|
|
|
By Graham K. Rogers
The first backup of around 250 GB did not take too long, so I decided to unmount the disks before putting the Mac to sleep for the night. As I had done before, I clicked on both disk icons (the LaCie and the older WD My Book Studio) and dragged them to the Trash/Eject button, bottom right of the screen. For some reason, a panel appeared telling me that the LaCie disk had not been ejected properly and warning of dire consequences.
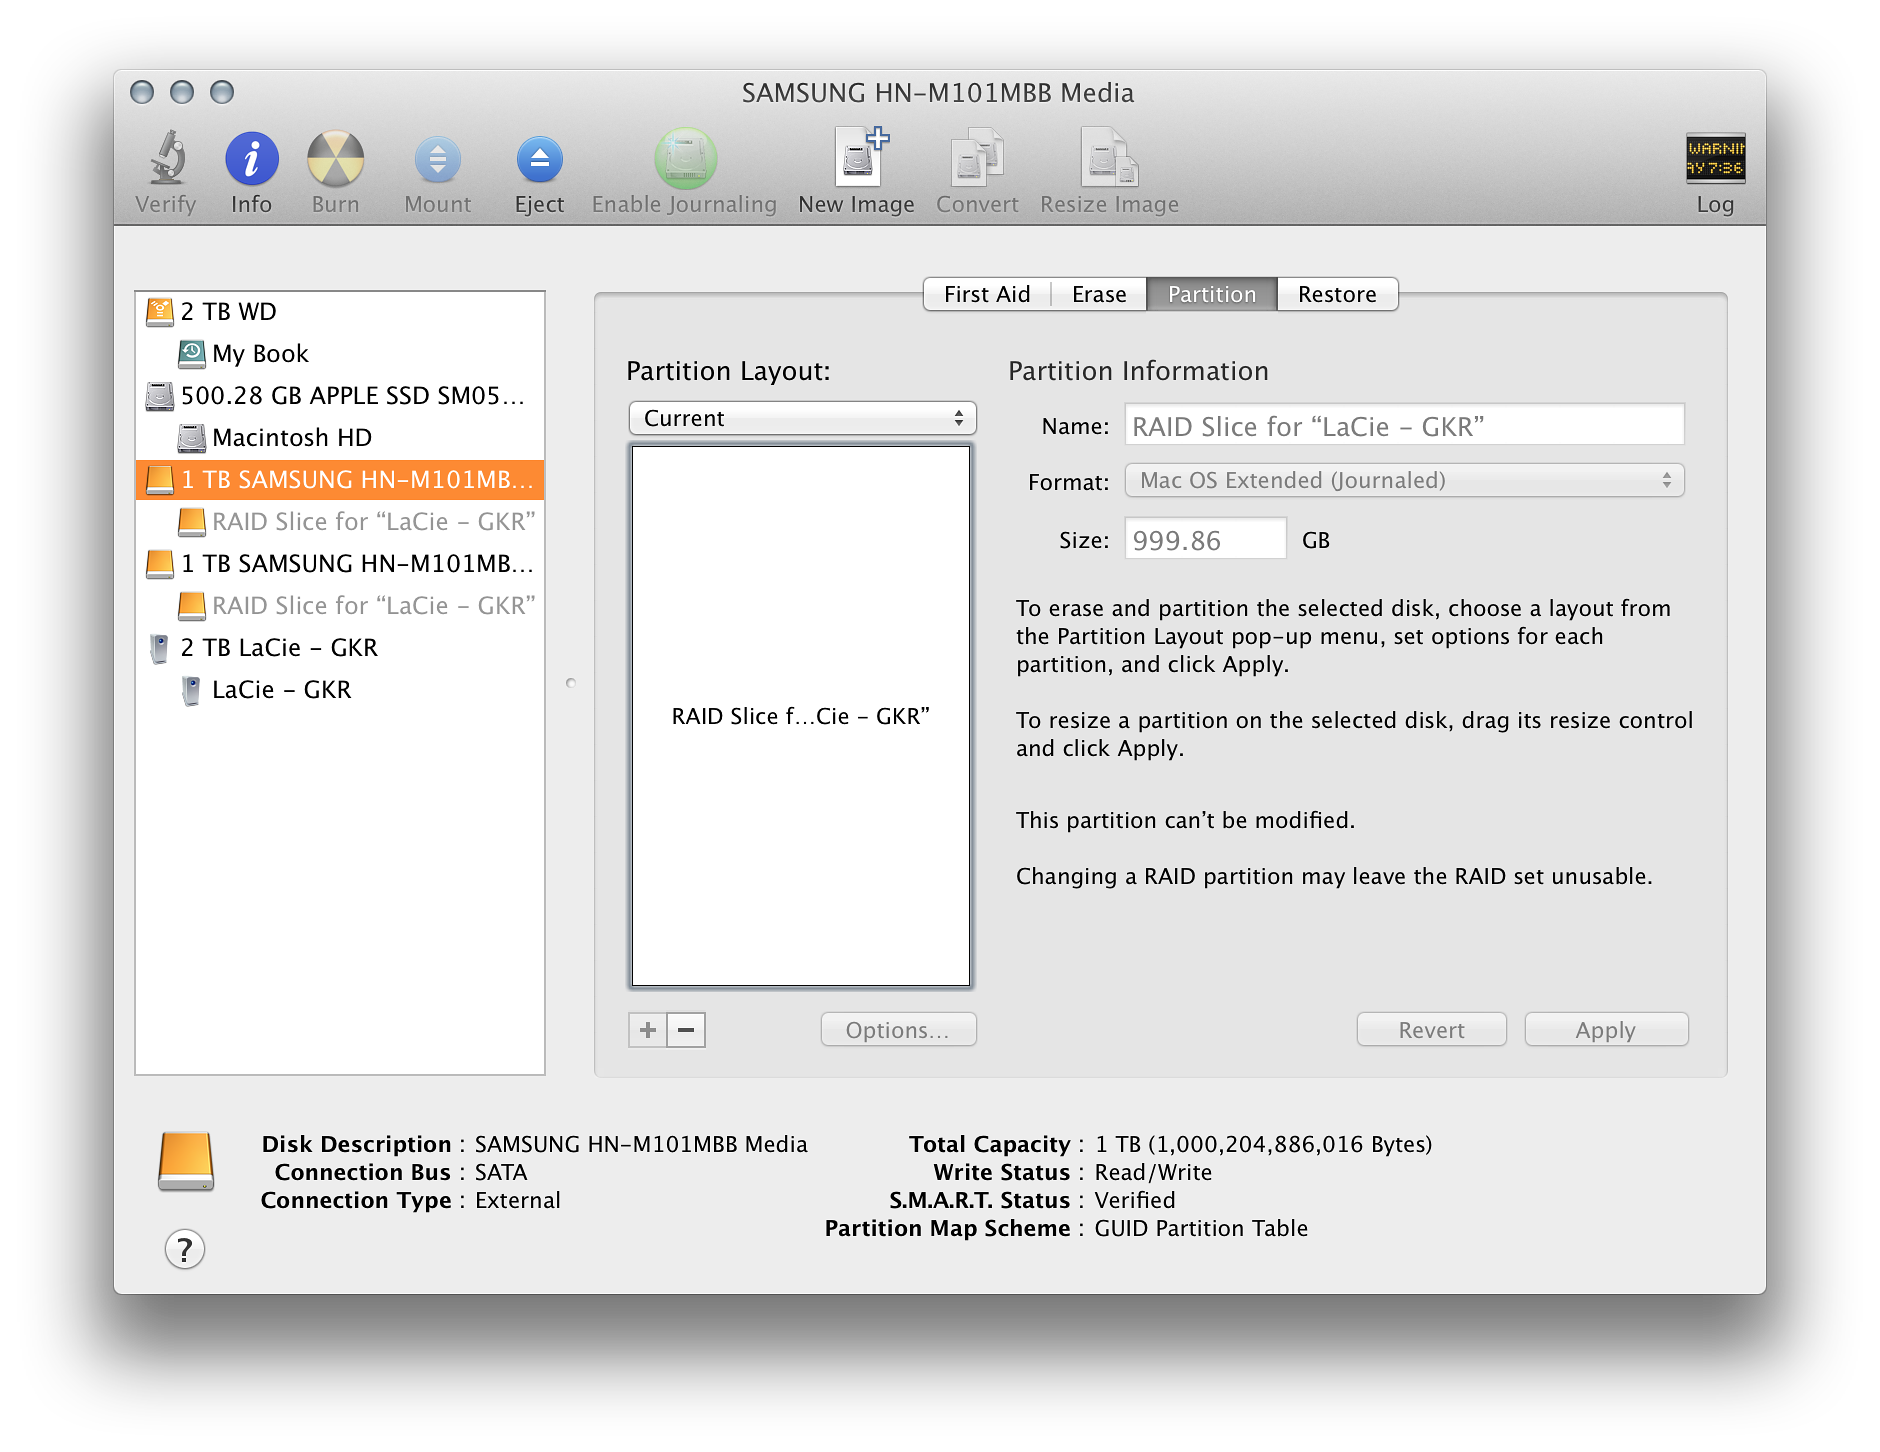
When I started Disk Utility, the disk was shown, in the same two-disk display I describe above. As I was unfamiliar with this, I checked and discovered that the LaCie casing does indeed contain two physical disks: a solution also used by the new Western Digital, My Passport Pro Thunderbolt disks.
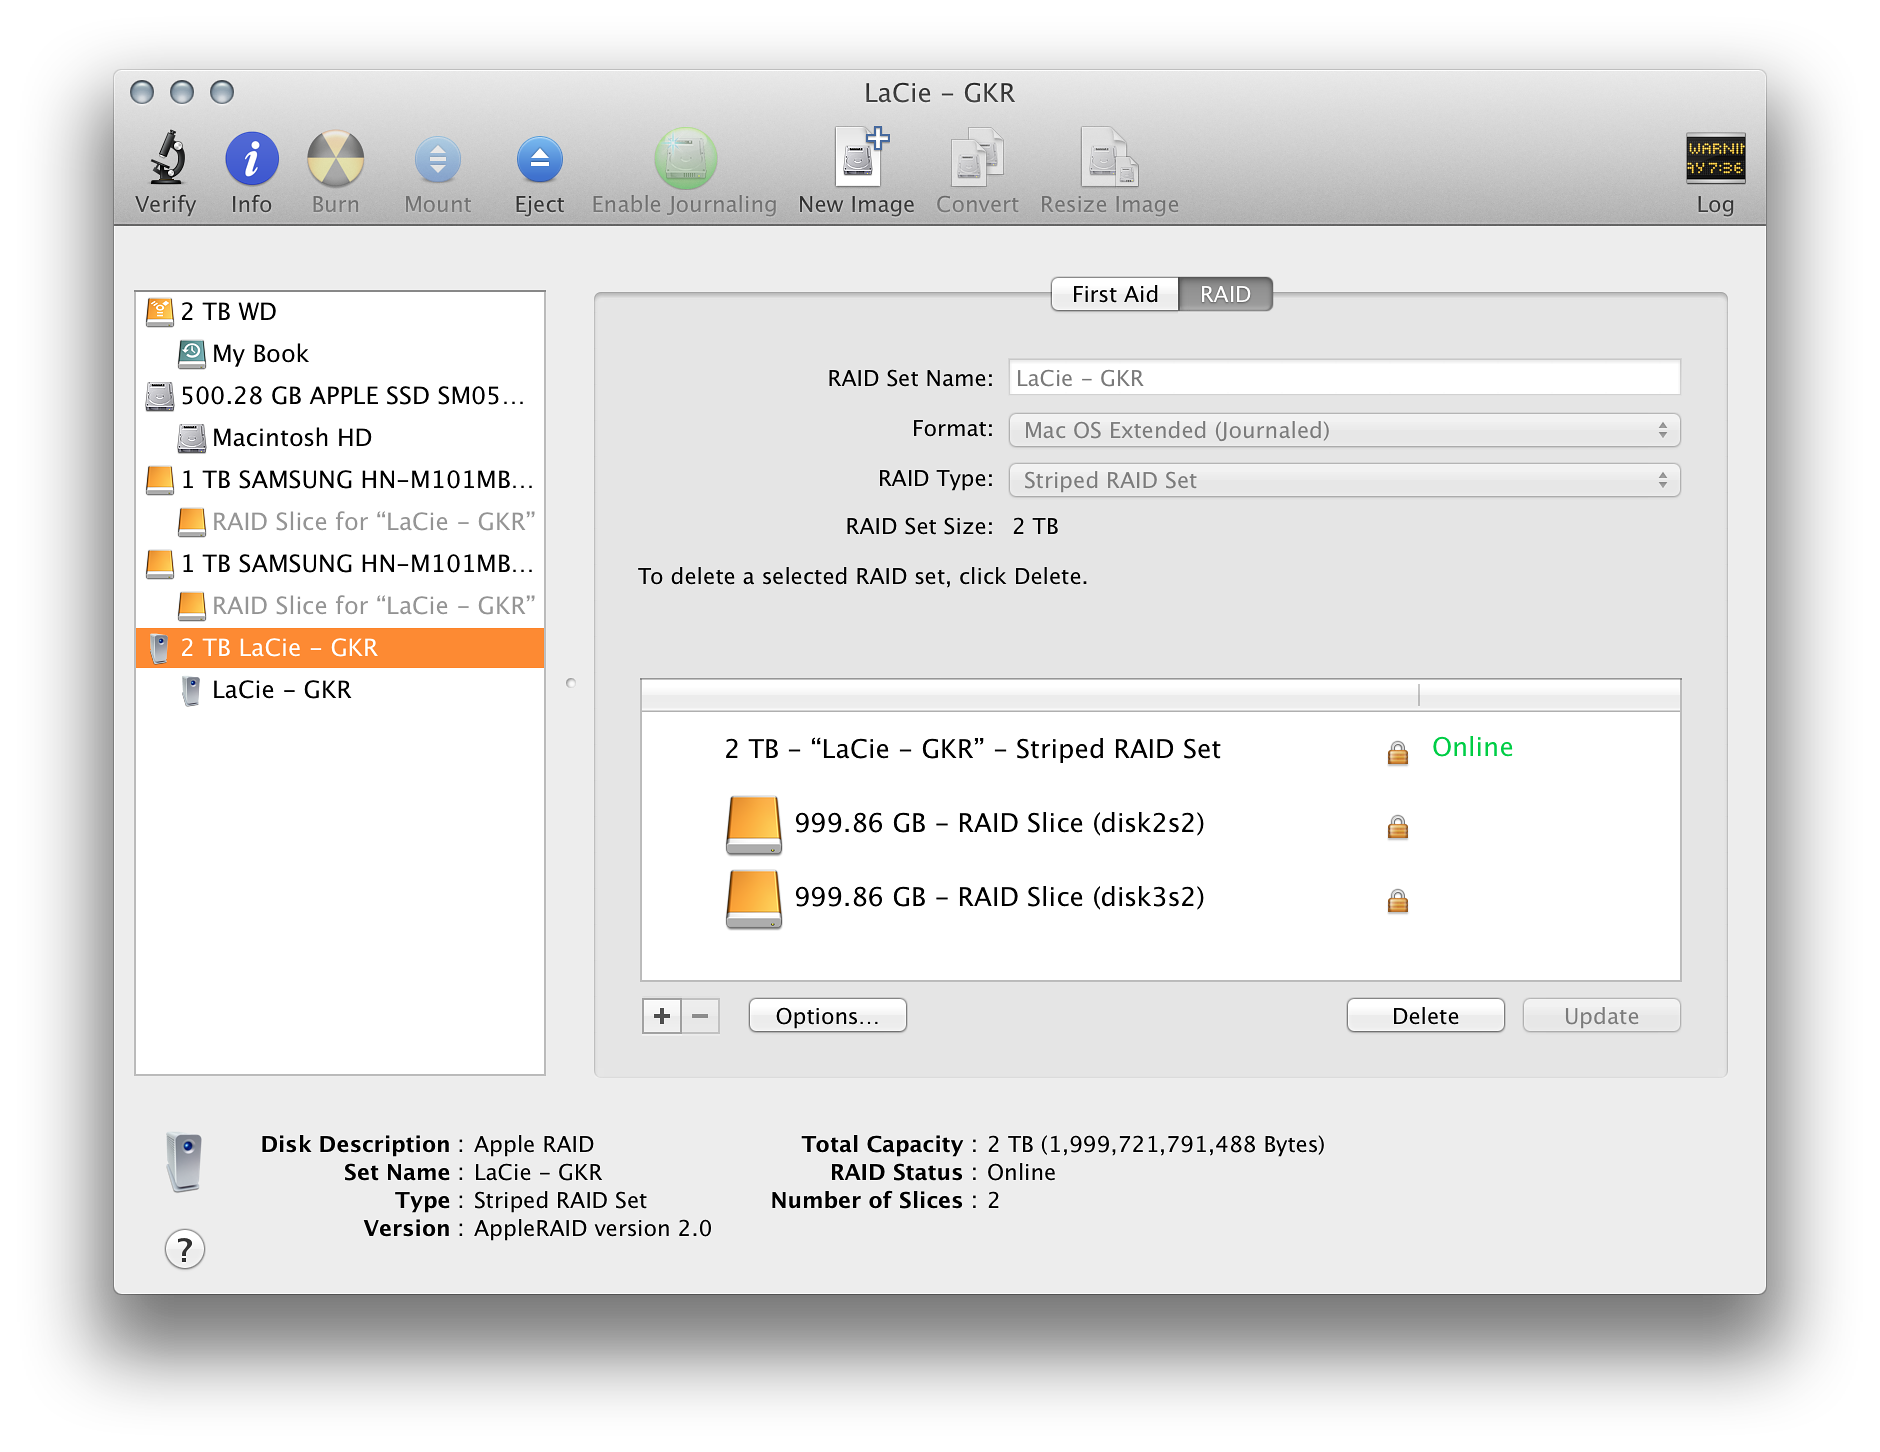
Fortunately, the LaCie site has a clear run-through of how to set up the disk as a RAID disk which is what I had originally. Using the Disk Utility > RAID panel I had a choice of Striped RAID or Mirrored RAID. The LaCie disk had come originally as Striped and I thought it best to return it to that condition. In this state 2 TB is available for storage. The Mirrored RAID provides a more secure system as data is the same on both disks, but only 1 TB of space would be available. This is the default condition of the Western Digital My Passport Pro disk.
I contacted LaCie with two comments: one about the OS selector; and also asking about the LaCie logo: the disk looked far better with the original display than that bland orange. The reply on the icon was quick and I was provided with a link that enabled me to download a couple of folders of LaCie icons. To change the orange icon to the LaCie image I highlighted the disk and selected Information (Command + i). I did the same with the LaCie icon file. At the top right is the icon and on the LaCie file I highlighted this and pressed Command + C (copy). I highlighted the icon on the hard disk information panel, the pressed Command + P (Paste). My disk had its proper icon back right away. As for the OS display on the Support pages, I was told in a follow up message that this was being attended to.
There was another incident of the Finder reporting that the LaCie disk had not been unmounted correctly, with the panel adding information about its power being cut. As the other disk was not affected and there appeared to have been no loss of power, I wonder if I had disturbed the cables while moving the computer (or when leaving the room). I later checked the connections and all appear to be firm, so this is a mystery, although fortunately this time the data was intact. I will be watching this closely.
Graham K. Rogers teaches at the Faculty of Engineering, Mahidol University in Thailand where he is also Assistant Dean. He wrote in the Bangkok Post, Database supplement on IT subjects. For the last seven years of Database he wrote a column on Apple and Macs. He is now continuing that in the Bangkok Post supplement, Life. |
|

For further information, e-mail to

|

|

 Although the staff member at iStudio had suggested to me when I bought it that I should consider reformatting, a look in Disk Utility showed me a twin-disk setup and my first thought was to leave well alone as this was nothing I was familiar with. I set the disk up as an additional Time Machine disk using