PopAGraph: A Photo App that Takes a Little Learning; but with Useful Results

AMITIAE - Friday 5 April 2013
|
PopAGraph: A Photo App that Takes a Little Learning; but with Useful Results |
|
|
|
By Graham K. Rogers
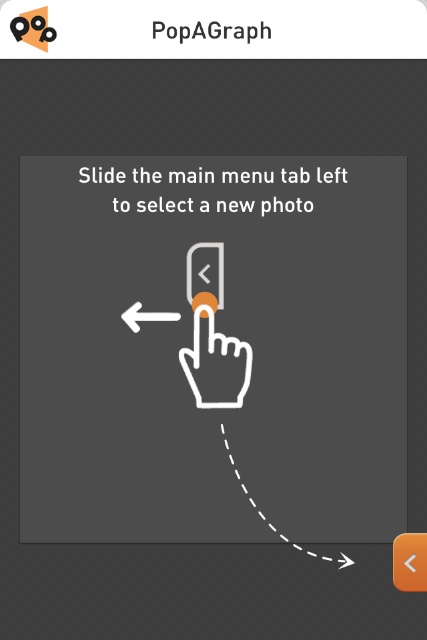
PopAGraphWhen I first open an app I make several assumptions. The first being that it is going to work. When PopAGraph is first opened, the user is offered a video tutorial. I tend to ignore these as part of my process of finding out if the app works intuitively. As each new part of the process is accessed, so the user is offered a video. I ignored these. I would suggest that a first time user do take the time to run the tutorials at least once. There are some basic onscreen instuctions, but the videos help, practice helps more.While I had a clear idea what the app would do, it was the fine details that I was missing. When I did go back to the videos, it became clearer; but it was not until I had run the process on several images that I began to be happy about the output I was producing. It did not take long, but this is not an app that produced instant results.
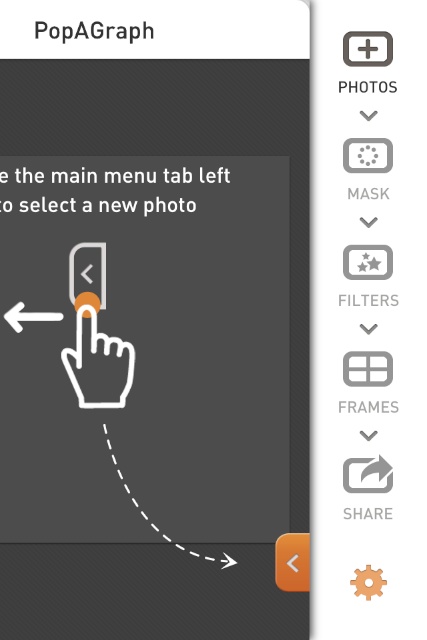
The menu that appears at the side when the orange tab is slid to the left reveals the workflow menu: Photos, Mask, Filters, Frames, then Share. A Settings gear icon at the bottom has a few ways to contact the developers or rate the app, but at the top is a Help link that reveals a number of questions. Tapping any one reveals a link for a video. This may be slow if the user's internet connection is poor.
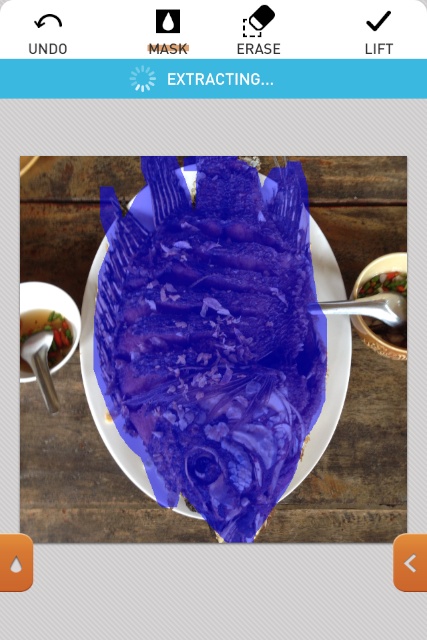
Starting the ProcessAdding photos can only be done from the iOS device photo Libraries. There is no access to the camera. If a project is running, selecting a new photograph will delete that project (make sure it is saved/exported first). A Trash icon at the top of the photo library list will also delete the current project. The user is warned each time.Having selected an image, it appears in a square frame. It may be resized or moved within the frame. An icon marked "Original" to the right of the Crop icon may be used to view the original image. Pressing "Use" at the top right will crop the image and the process is moved to the next stage: Mask. The Mask section is set ready to go and the user outlines the main object that is to be the focus of the finished image by drawing a colored line round it. I did not find there was a need for great accuracy with the way the app works, but a tight outline can be made by use of the erase feature, and by using the pinch to enlarge the image so that all of the desired section can be included. A tab at bottom left opens a tool panel so that the brush may be changed (round or square) and the outline color changed. Once the basic outline is complete, the app automatically fills in the center section. The user then presses the Lift icon at the top right. When Lift is pressed the app begins the process of extracting and when finished - this is where I was confused - there appears to be no change. Trust the developers. They have this right. Proof is when we use the Filters: the next stage.
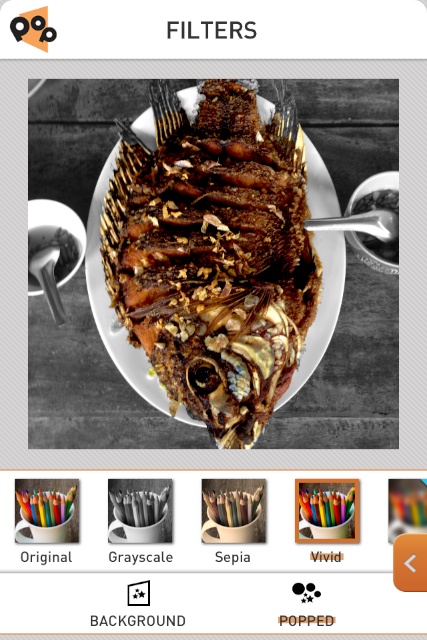
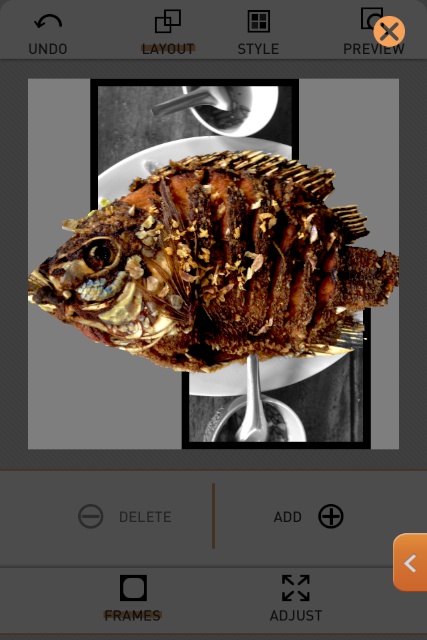
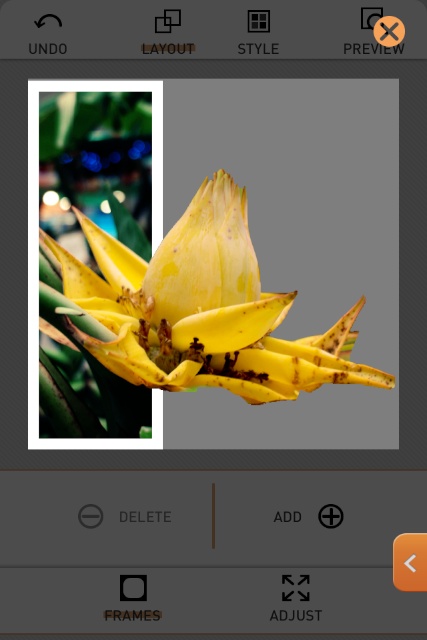
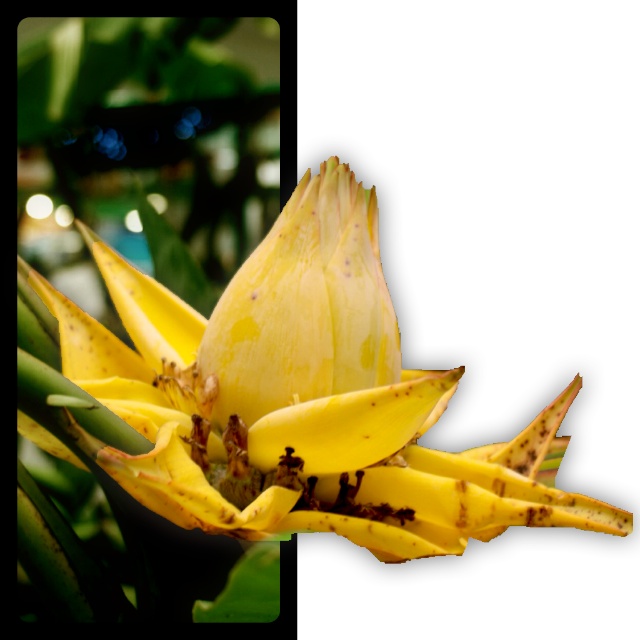
Adding EffectsThe image in what appears to be its original state is shown onscreen. The quickest way to show that the extraction was done right is to select the Grayscale background filter. Almost right away, the core image in color is displayed on a monochrome background. As with any background, the selection of the original image is important and my first tries were with photographs taken on white backgrounds. There are 16 filters (plus none) shown, but all except 3 of these filters has a lock icon shown. These may be unlocked with an in-app purchase.As well as Background shown in the bottom toolbar, there is also the word "Popped" which refers to the image that has been popped or released from its original background. So switching to this item allows the central image to be manipulated as well. As with any such effects, the basic rule of "less is more" applies. Some filters may not suit the user, and some combinations of effects may not work properly. Some work very well. The section marked Frames was the hardest to get right. A frame in this app is not an exterior decoration, but is an editing tool to remove a par (or parts) of the image so that the final output is more shaped. This needs much care. There are several controls starting with Add (and delete). The new frame fills the square of the image and can be adjusted smaller with six contact points. Adding a frame cuts out the background and leaves the core image remaining. This needs to be applied carefully. One frame may be OK; two may work; three frames need careful consideration. While working a useful Preview icon (top right) gives an exact display of what the final image would look like. With this, the user can go back and forth getting the best output. Once a frame setup has been decided on, there are a number of ways that the frame can be adjusted. BY pinching, it may be zoomed, while another gesture will turn the image. There are also icons beneath the image that allow rotation and inversion. A Style icon accesses controls that will change the color of the frame itself. The frame width and corner roundness can be changed with gestures: swiping the touchscreen. There are 11 colours available for the frames, but only two (black and white) are included. The rest are part of the in-app purchase.
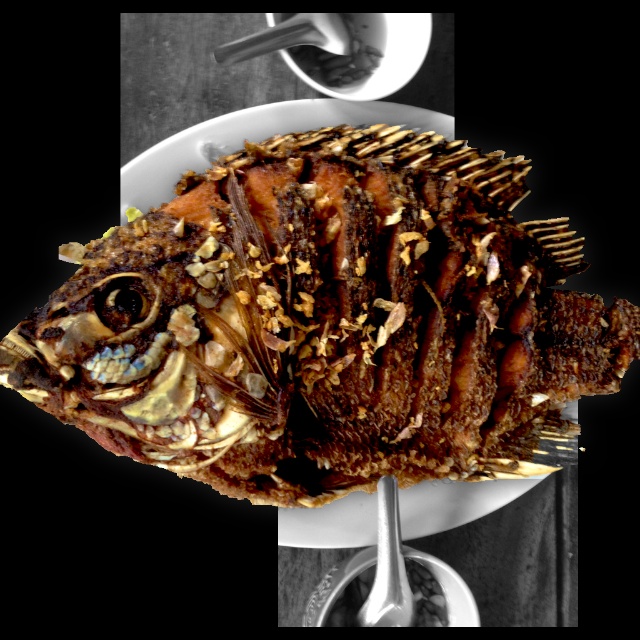
Finishing and ExportsWhen the adjustments are finished, the photograph is exported, via the Share icon. However, as this is pressed, one more option becomes available: the background for the cut portion of the image. Three options are available with the app (white, black, grey) but another 10 - including the useful clear (transparent) may be purchased. At this stage there are also some shadowing effects that can be used.The effects and filters that are only available as in-app purchases can still be used. The user can try these out to see the potential, but any images created using these will have a watermark: the PopAGraph icon is displayed clearly. To avoid this with one image, I went back to the Filters section after having set up the Frames and Background and selected another filter. The final export is by way of a Share icon in the Share section, which seems less clear than it could be, but adding the final effects and backdrop to this section cause this minor discrepancy. There are 6 methods that can be used: Instagram, facebook, Twitter, Library, Email and SMS. Exporting by email gave me four size options with the largest at 1.4 MB. Saving to the Library, gave me similar images that were transferred to the Mac using PhotoStream. In Aperture, I found the exported images to be identical: 1024 x 1024 (1.4 MB). I was a little disappointed by this, especially with the effects I was beginning to see, but an export of the two best as 8-bit TIFF files, produced images 14" x 14". The best one was enlarged to 20" x 20" without too much distortion. I should add here that the developers clearly intend this app to be used for export of images to social networking sites like Instagram and Facebook, so users will not be expecting magazine quality output.
CommentsI am glad I persevered with PopAGraph. Despite a process that I did not find instinctive, the ends results were fairly satisfying. The best output may be produced with a lot of fiddly trial and error work, so this may not suit some users who want an instant result. That is almost possible - workflow permitting - but attention to minor details will pay off. As above, it would be better on first opening the app for new users to run the videos. Then a few test images should bring them up to speed.A lot of thought has gone into producing this app but most of the skills are hidden below the surface: the app does its job rather well, but we do not see it working. This is particularly notable with Masking when some intelligent processing goes on. A slight disappointment came when I tried this on the iPad. The app is not optimised for the device, so only displayed in the x1 and x2 formats. However, the larger display does make it easier to work with the app, especially in the x2 format: what is lost in sharpness is more than made up for with the screen size. Some of the best effects are reserved for those who make the in-app purchases. The style package (backgrounds) is $0.99; the Filters cost $1.99. I decided to buy the Filters package. When I bought this again for the iPad I was correctly reminded that I had already made the purchase and I was offered the download again.
Graham K. Rogers teaches at the Faculty of Engineering, Mahidol University in Thailand. He wrote in the Bangkok Post, Database supplement on IT subjects. For the last seven years of Database he wrote a column on Apple and Macs. |
|

For further information, e-mail to
|

|