|
|
Once a clip has been selected the Inspector can be accessed in three ways: a user may press the "i" icon in the centre of the working panel; the individual functions, such as those to the Clip itself, may be accessed via the "Window" menu; and in that menu the letter commands are shown, I for adjustments to the Clip, V for Video and A for Audio. That menu also shows that the C key can be used to change Cropping, the Ken Burns Effect and Rotation. With any of these, a clip must be selected first. The Inspector panel has three parts: Clip, Video and Audio and those key commands are a quick way to a specific function in the panel.
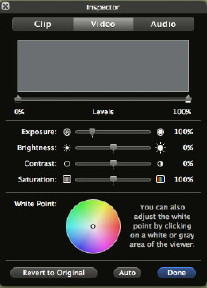
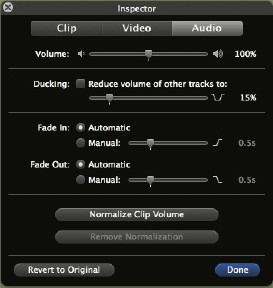
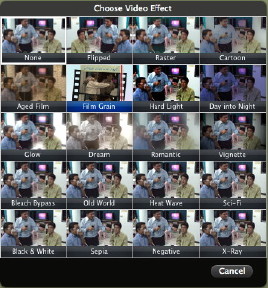
Although the default clip time is 4 seconds, this can be changed using this panel: more (or less) of the original clip is used. There are some 19 effects which may be applied, such as Dream, Romantic, Black and White and X-ray. When applied, the change takes place with no time lag. The clip in the time-line is unchanged: the display shows the alterations. If the speed of the clip is to be adjusted using the Inspector, the entire clip needs to be converted. This may take a couple of minutes, depending on its length. Once done, the user can adjust the speed with a slider: a hare icon is to the right and a tortoise to the left. The effect is applied instantly and is also applied to any audio. A check box here will reverse the clip direction. At the bottom of this part of the panel is stabilisation: a simple check box. When applied, the clip is analysed - a process which took me about 30 seconds for a 4-second clip. As the clips I had been using came from a small, hand-held camera, there was some camera shake. Using this feature smoothed this out and the main content became easier to view. When this is used, the zoom function appears, but the amount of change available here is limited. The video inspector is similar to the iPhoto Adjustments panel. There are a number of changes that may be made to the clip in terms of exposure, brightness, contrast and saturation, using sliders. White point may also be adjusted. The final part of the Inspector is the Audio panel and this gives the user a number of useful controls with which the sound recorded with a clip may be altered. Among the options here are volume, ducking (for reducing the volume of other tracks), fade in and fade out.
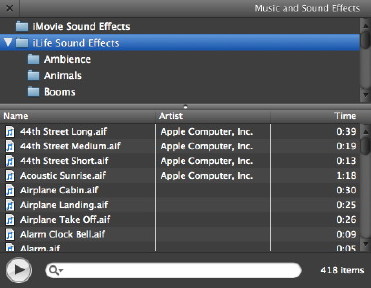
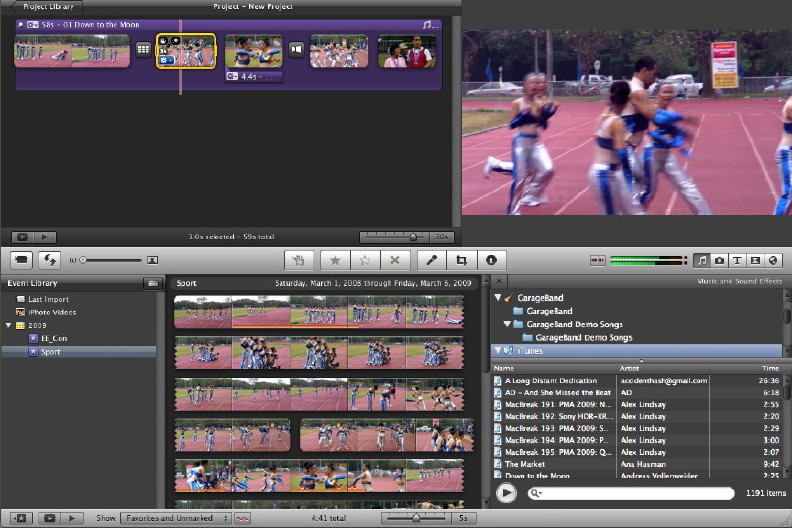
With my installation, clicking on the Music icon opens a panel with four main sources: iMovie sound effects, which access the 95 items installed; the 418 iLife sound affects ranging from music to cartoon sounds; GarageBand songs; and the user's complete iTunes' library. Any may be dragged into the movie timeline.
The Inspector and other sources allow home users, or those in small offices a variety of tools for creating and adjusting video, and to assemble clips easily into a movie.
|
|

 When clips have been assembled in the new iMovie (now updated to version 8.0.1), there is an array of tools for adjusting the clips, the video and the sound. The Inspector, a feature in many applications on Macs, reveals a panel similar to the Adjustment and Slideshow panels in iPhoto.
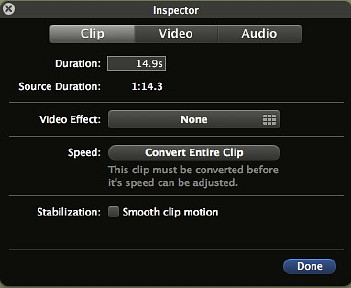
 In the Inspector panel, Clip controls the time, effects and speed of the selection, plus zoom. Some effects may take a while to apply, especially if stabilisation has been applied beforehand as it is recalculated.