|
|
Welcome to 2008. The next weeks will see some news from Apple in Cupertino -- perhaps new products. The next group of preferences, is for Networking, which is fairly important for any computer, and complex enough to have a column for it alone. Making connections to the outside world has been completely rewritten in the latest version of OS X. While some things appear similar, there are significant changes, most "under the hood". The preference pane itself has a new look, which is not unusual when Apple updates, but it needs a careful look just the same. At the top is the Location button: with the Mac, the default location is "Automatic", but those who use a computer in a number of places -- home, office, and airports -- may want specific settings for each.
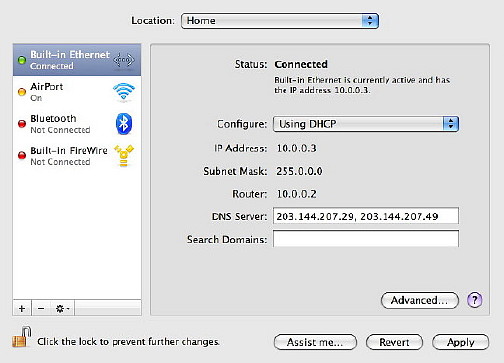
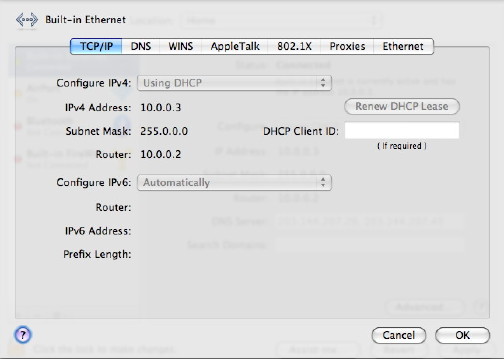
Below the location, are two major parts to the panel. The left side displays the installed connections and the right details of the highlighted (current) connection. The connection types are as before although they have some new icons to make them clearer. Each connection type has a coloured "light" alongside: either red (off), green (connected) or yellow (on but not connected). I see the yellow when WiFi is turned on but not linked to a system, for example; or when the Ethernet cable is plugged in but the router has not allocated an IP number. The bottom of the panel has three small icons: + (plus), - (minus) and a gear-wheel for changes to be made. The right-side panel changes depending on the selected connection. It displays the method of configuration (which can be changed) and basic details of the connection, such as IP numbers. The editing changes are now made by pressing the lower button marked, "Advanced", where detailed information concerning TCP/IP, DNS, WINS (Windows Internet Naming Service), AppleTalk, 802.1X (for authentication), Proxies and Ethernet.
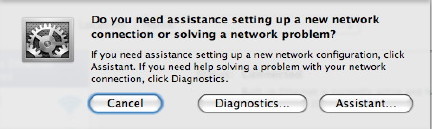
Two other buttons are avaialble, Revert, and Assist Me. This provides help in two ways: for those setting up a network, or for diagnostics of a network that is not behaving itself.
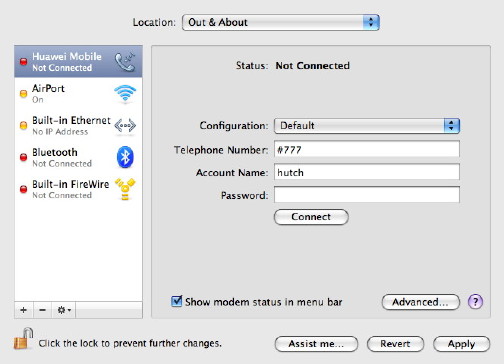
Adding a network is easy enough by simply creating a new location, but adding a device needs some care. Apple computers do not come with internal modems these days, but external ones may be used. When you press the lower + button the panel opened reveals Interface and Service Name (what you want to call it). In the Interface button there are several choices, but sometimes not what we want. I found a problem with my Hutch CDMA service wireless modem from Huawei. It failed to be recognised after the update to Leopard and whatever I tried failed. Fortunately, Worawut Phithiraattan of Hutch's customer service department came to the rescue (for the second time, I might add). As I had suspected, with the Leopard update, the old modem driver was no longer working and I needed a replacement which Worawut sent me, along with some screen shots and a full set of instructions. The trick here was first to install the new modem driver and then to connect the device (in this case using USB) and wait. He suggested two minutes, but I left it for three. When I then opened the Interface panel a new service (the CDMA modem) was recognised. I selected that and the device appeared now in the panel of devices. From there I could highlight it and continue to the entry of device settings, selecting the modem type as part of that process.
Another change here that is related to the connection process is that in Leopard the application, Internet Connect, is no more. Once a device is installed, a connection can be made either directly from the preference panel (which seems messy to me) or via a neat mebubar icon, but with this there is far less information displayed for the user. As it gets easier, so the user has less interaction with the process itself.
|
|
