eXtensions
|
Burning with iDVD and its integration with iLife |
Over recent weeks I have focussed on some components of iLife. All of the parts work so well together that using data from one in another is not a major task of discovery.
Using iPhoto I made movie clips from slideshows. I imported these into iMovie then assembled them with clips from a camera and from outside sources. In iMovie too, I was able to import images directly from iPhoto and, with the addition of the Ken Burns Effect, use these (now-moving) images, in the movie time-line.
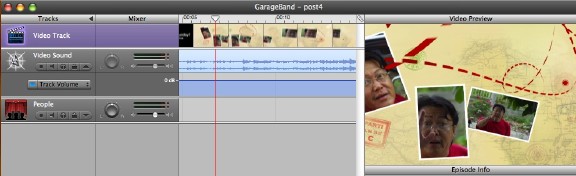
As I wanted to burn the projects onto a DVD disk, I had two options. I could add a soundtrack in iMovie and then export to iDVD; or I could export to GarageBand 3 and work on a soundtrack there. Using GarageBand would also enable me to add sound effects (for example, laughter) as well as music; and position the sound exactly where it was wanted on a timeline.
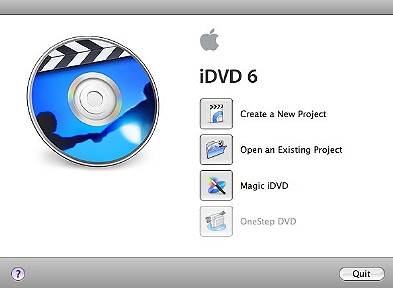
When the project was complete, I selected the "Send movie to iDVD" option in the Sharing menu of GarageBand. The export process opened iDVD automatically displaying the "Themes" panels. There are several to choose from, including those from earlier versions of iDVD.
The theme is the panel, shown when a DVD is seen on a television, which displays the menu. The default menu has the title of the project but this can be changed. A theme has several drop zones, like those in iMovie, into which we can put images or movie clips.
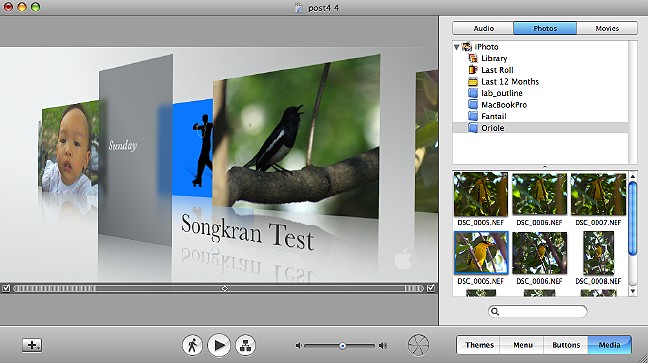
Media panels give access to photos and movies (and audio). We can select from these or import directly from the Finder. Movie clips can be found in the Movies folder, in iPhoto and in iTunes (podcasts). Once the Theme was complete, I added music from the Audio panel: selections are from GarageBand or iTunes and we need to take care here with copyright.
With the way these themes display the menu images (and the way they move across the screen), the finished product looks professional and would make an impressive product demo disk.
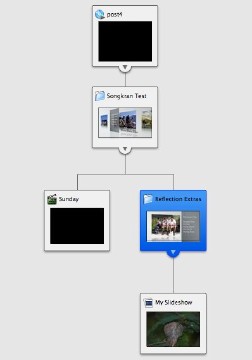 A DVD Map panel enables the addition of other submenus and movies (or slideshows) so that an entire project is built from the different media available on the computer. Within this panel is also a box for a display when the disk is first started in a player. Such displays are optional and if not used, the disk opens at the menu.
With menus and submenus complete, and all the movie media included in the project, we can click on the Burn button at the bottom of the iDVD screen or select "Burn DVD" in the File menu.
Here I had a problem. My PowerBook does not have the Superdrive that burns DVDs. Fortunately, one of the Mac minis I have at my office does, so I needed to put the project on that computer.
Using Save As in the File menu is not good enough: the file created is an outline of the project. It includes only the necessary links to the media on the original computer. If that file is transferred, none of the media files are available.
The alternative is to use Archive project (themes and encoded files are included by default). My project file including four small movies, the themes and some music was 308MB. As an archive file it was 2.17G but it was now totally transportable to any other Mac running iDVD.
The next problem was transporting it. On the office network, the Finder panel indicated that the transfer would take more than 4 hours; and it was already getting dangerously near tea time. I started up the Mac mini in Target mode and linked the two machines with a Firewire cable (6-pin to 6-pin). Sending the file took five minutes.
Once I had checked that it was all there, I pressed "Burn". In went a disk when the software asked. The application then went through a series of processes: prepare, process menus, process slideshows, process movies, and burn.
The one menu I had was completed in 5 minutes. Processing slideshows was passed as none were included in this project. Four short movies had been brought in and processing these took 16 minutes. The time for this, and for the other functions will differ, depending on the size of project parts, the processor, and computer memory (RAM).
Finally, the burn itself has component parts: writing lead-in, writing, and writing lead-out. The burn took 8 minutes and the disk was ejected at the very instant the software reported that it was complete. I tested it on the PowerBoook, and on a number of DVD players.
Once the project has been planned and all media located, the creation of the DVD itself is straightforward. Like other parts of iLife, this application is fully integrated into the media operations of the Mac.

For further information, e-mail to Graham K. Rogers.
Back to
eXtensions
To
eXtensions: 2004-05
To
eXtensions: Year Two
To
eXtensions: Year One
To
eXtensions: Book Reviews
Back to homepage