DSLR Camera - Excellent Camera and Video app: Wide Range of Editing tools and Access from Apple Watch (Updated)

eXtensions - Tuesday 13 June 2017
|
DSLR Camera - Excellent Camera and Video app: Wide Range of Editing tools and Access from Apple Watch (Updated) |
|
|
|
By Graham K. Rogers
There are far too many apps that are never really visible for one reason or another: Editor's Choices may not be my choices. Once in a while I find one of these and take a closer look. This week, I found the Italian-developed DSLR Camera which takes a hybrid approach to photography: automatic, or manual settings if needed. The app which first appeared in 2014 also has the option to save files in RAW (DNG) format. The app is a little gem except for one problem that irked me initially: the poor English. This was mentioned in a review of another app only a couple of weeks ago (I cannot find this now). It is not hard to understand what is meant, but spelling and other errors can be easily fixed if only a developer takes the time to run it past a native speaker. We see too many examples of this here and it is not as if native speakers of English are thin on the ground. The point made in that other review was that, if not enough care is taken on this aspect, what other shortcomings may there be? In this case, however, it is worth ignoring this as DSLR Camera is a hidden gem with camera, video and extensive editing capabilities as well as an excellent Apple Watch installation.
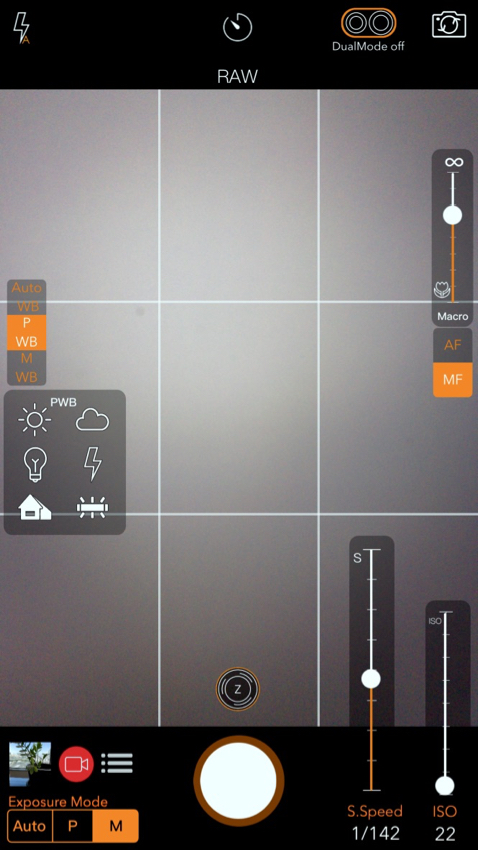
DSLR CameraWhen first opened, there are a number of panels (some with that dubious English) that request access to the camera and other features, including location (see below). The app displays a fairly clean screen, with unobtrusive controls to the left, right, top and bottom.At top left is a flash icon. Like almost all of the onscreen controls, tapping this reveals control settings: in this case, On/Off/Automatic. At center top is a time icon with options for Off/3s/10s/20s. To the right is a control to switch between front and rear cameras. This can also be done by swiping the screen up or down. On the iPhone 7 Plus only, there is an icon for dual mode between the timer and front/rear camera icon. Dual mode is on or off. When Dual mode is in use, near the bottom of the screen is a small circle marked Z for normal use and W for x2 zoom. At night, using the x2 lens affected exposure (see below). When the x1 lens was used, white balance was controlled more effectively than with the Apple iPhone camera app. As there is still no White Balance control in Photos on iOS, this is worth remembering. However, when Dual Mode was off, most of the controls are unavailable. These controls are always shown when the app was used with the single-lens iPhone 7 which does not have Dual Mode.
Opposite, on the right side of the screen, is a selector for Auto or Manual Focus. Manual displays a slider that runs from infinity down to a Macro option. This is effective for subjects about 2-3" away and only works with the x1 lens. It is about the same distance for the single-lens iPhone 7. With some careful use, it is possible to take a sharp closeup with a blurred background with the iPhone 7 (and iPhone 7 Plus), just like the Portrait Mode on the twin lens of the iPhone 7 Plus. I was also to reproduce this effect on the iPhone SE using the manual slider.
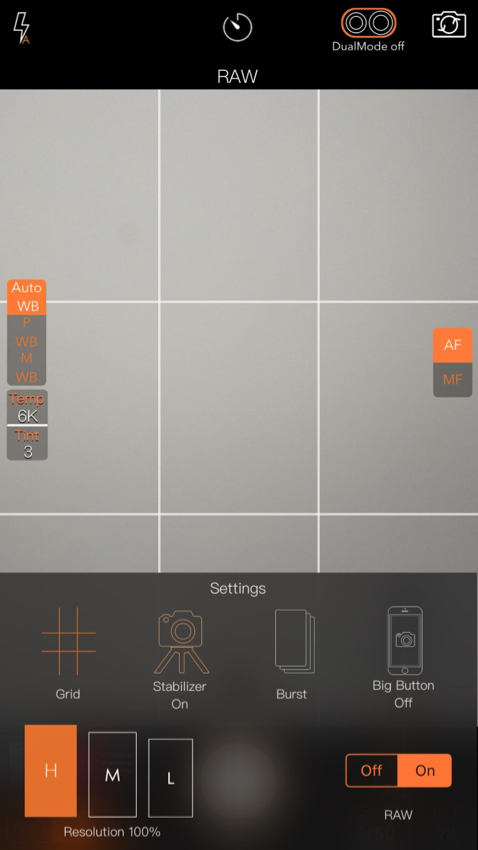
When Auto is used, the current shutter speed and ISO are shown to the right. P (Program) shows a slider for the Shutter speed, from 1/17 to 1/20000 (twenty thousand). When Manual is used, there are sliders for both Shutter speed (1/3.0 to 1/10000) and ISO from 22 to 1760. The camera stays on if the app is open, and laying it on a surface, lens down, sometimes upset the exposure on one lens with the iPhone 7 Plus. A quick restart of the app cleared that. Above Exposure Mode controls are three icons: Settings, Video mode and Library. Settings reveal a number of options, including RAW, resolution and the grid. A Burst mode option allows the user to choose the number of images in a burst, from 2 to 10. That number is then displayed on the shutter button: nice attention to detail. The Video mode has many of the controls available for the camera, white balance, exposure modes, auto and manual focus. These controls are now red instead of the orange for the camera. A torch icon replaced the flash and this turns the light on fully while in use (beware battery). Back and front cameras are available (also with the swipe), as are the dual lenses of the iPhone 7 Plus if the feature is On for the camera. If Dual mode is Off, the video option is not available. With the single lens of the iPhone 7, Video is an option.
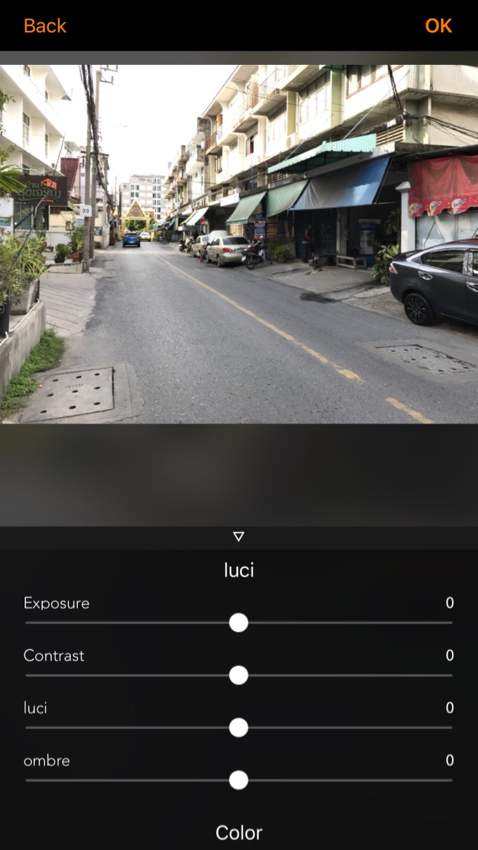
EditingWith the strength and features of the camera and video options in the app, I was surprised to find fairly good image editing features as well. The library can be accessed via the icon to the left of Video (or Settings if the Video icon is not shown). The full Photos gallery is accessible, so any image may be edited. However, when this is done, the title at the top of the app changes from Gallery to Reflex Camera.At the bottom of the screen are export controls, Trash and the words, Photo Editor. When this is pressed a surprisingly good range of editing and filter tools is displayed with an icon for Adjustments on the left. This is followed by 7 generous filter sets, 2 fx filter groups, Blur, Splash, Rotate and Resize.
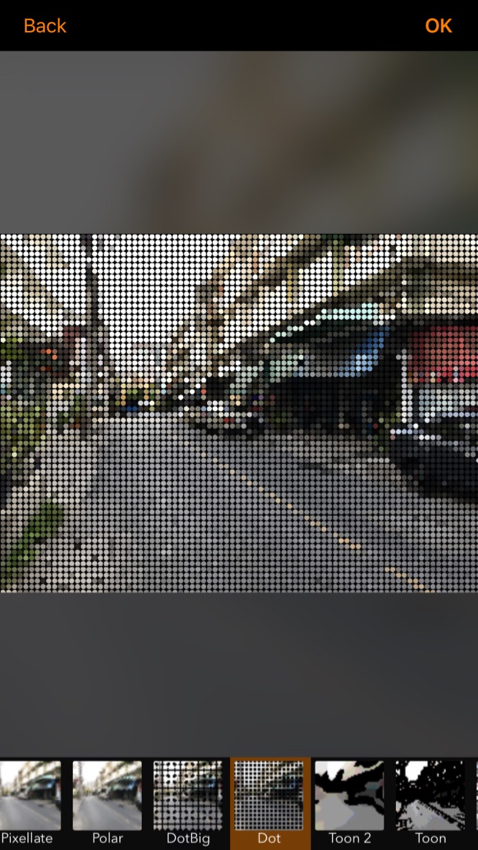
Adjustments, Filters and fx
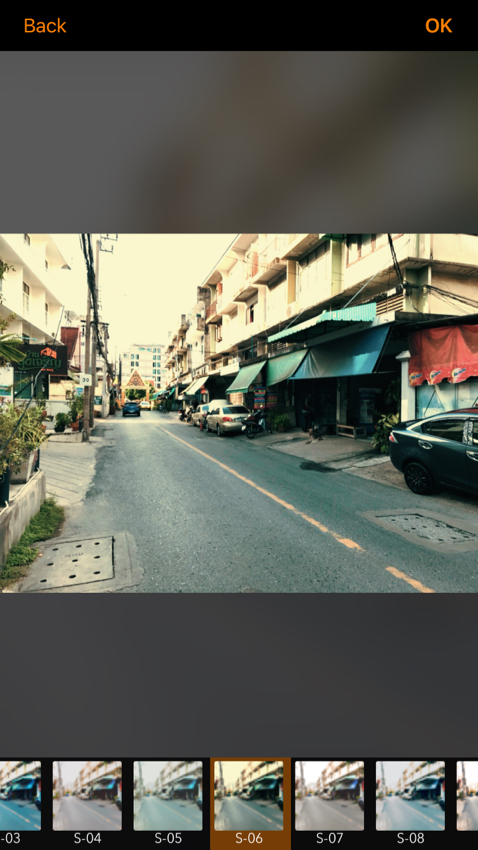
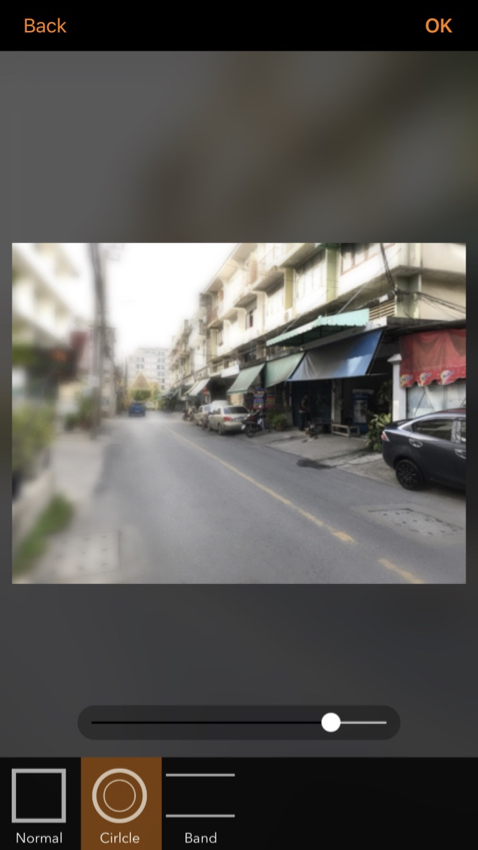
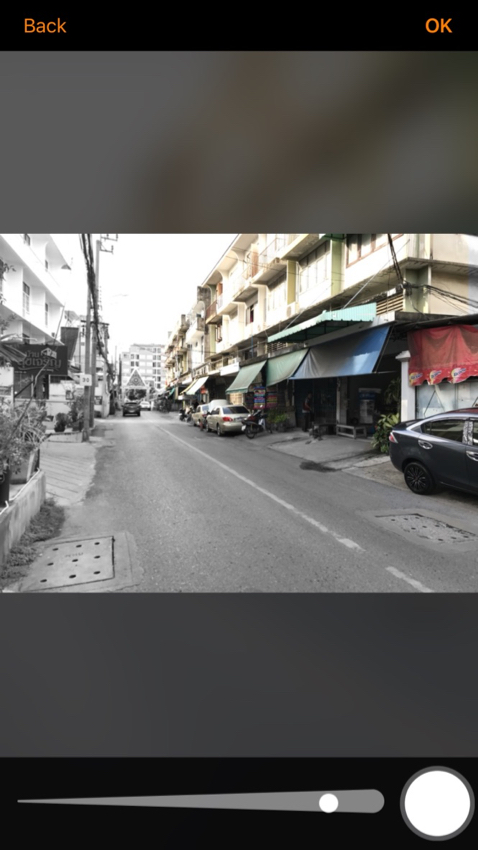
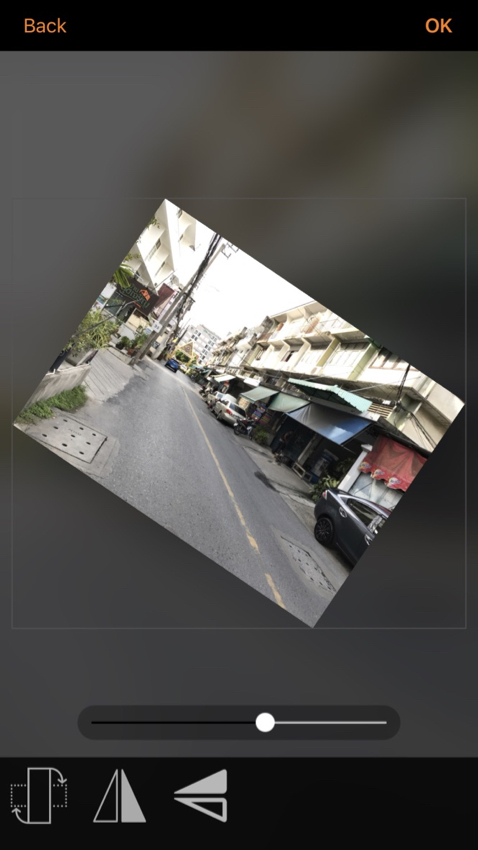
Filters available were Standard, PRO, Vivid, Bichrome, Strong, Vintage and RGB. Each had between 10 and 21 filters, with the PRO section containing 38. The fx set had 7 filters, each controlled with 2 sliders, while fx2 had another 10, but without sliders. Blur was controlled by a single slider and three options: Normal (equally applied), circle and parallel lines. These last two reminded me of the tilt shift software controls in other apps. The circle and lines could be adjusted by hand. Splash displayed a monochrome version of the image being edited and a slider below for size of the effect (small to large), with size indicated by a dot at the right. Rubbing a finger over the image returned the color. Tapping on the dot, changed the effect to "undo" so the color could be removed if necessary. Rotate provided tools for simple rotation 90 degrees at a time; for mirroring the image vertically; and for mirroring horizontally. A slider rotated left or right in increments, although the image stayed within its frame.
Blur, Splash and Rotate
Crop provides a Custom option so the image could be cropped manually, or presets (1:1, 3:4, 2:3, 9:16). An icon to the right changed these presets from vertical to horizontal resolutions. Tone Curve placed a semi-transparent curve over the broom part of the image which could be dragged with the fingers, showing an instant feedback of changes being made. Text tools allow entering of types content, color selection with a ring and sliders for strength, a scroll wheel for a full range of A-Z fonts, plus tools for alignment (left and center). Each of the tools can be applied by pressing OK (top right). Back to the left, removes an effect. Done appears at top right when the processing is complete and then offers Cancel or Save options, while at the bottom Share reveals the Apple export options that depend on the user's own settings.
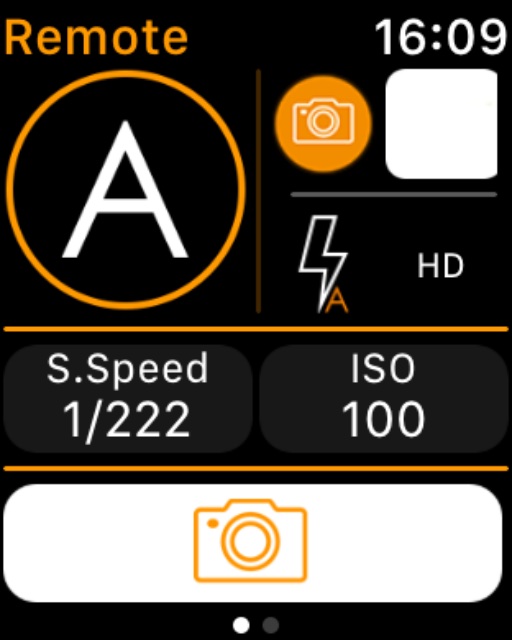
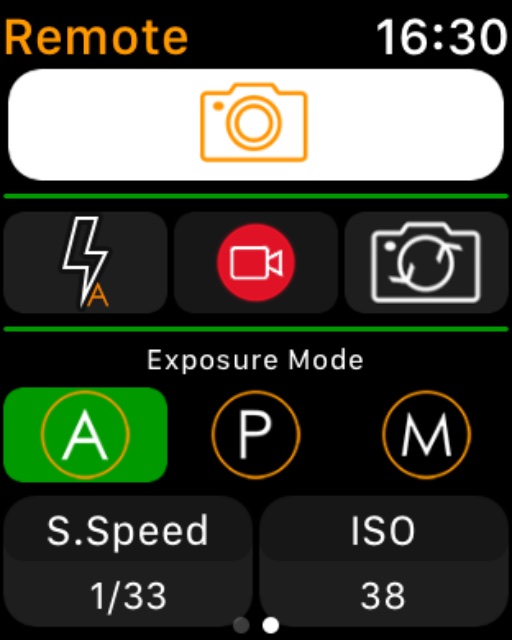
Apple WatchWith all the features already available, I had a look at the Apple Watch app for DSLR Camera. Pressing the icon, I was again surprised by this app and the 2 screens that were available. I found that to make this work effectively, the app had to be running on the iPhone before pressing the Apple Watch icon.
The remote app on the Apple Watch extends to control and operation of the video camera in DSLR Camera on the iPhone, which is much more than Apple's own app for the camera on the Apple Watch can do currently
CommentsAs a camera app, with its easy to use adjustments, DSLR Camera would be a good choice. Add to that its video cappablitlies, with similar controls over input and the decision is much easier. When a wide selection of photo editing tools and filters is also included, this becomes a valuable app, despite my comments about the need to examine English instructions, although the editing tools lucci and ombre do have a certain charm to them.Although I was asked to give permission for the app to use Location on the iPhones, no GPS data was shown in Photos on the iOS devices (I use the app, Investigate), or on the Mac. A more detailed examination in Aperture, shows that a wide range of metadata is recorded, but still no GPS data was available. Updated information on the GPS problems I found came as a result of a reader email who did find the map displayed in Information on the iPhone he was using and saving JPG images. Turning off and on a number of the controls (Dual camera, RAW) and changing the Location settings (Settings > General) did show the same map in new images in Photos. However, the GPS data was still not shown in Aperture, where there is a specific GPS display, nor in the iOS app Investigate. Image size in the DNG format was 4032 x 3024 whether RAW or JPG images were used. A RAW file was just over 12MB on the iPhone 7 Plus. I also installed DSLR Camera on the 12.9" iPad Pro where it was a little unwieldy but did work exactly as on the iPhone. Again, despite giving permission for GPS data and Location to be used, no GPS data was shown in images produced. I can see no way in settings to make this so. Despite the minor annoyance with the English displays, and the lack of GPS data on any of the devices I installed DSLR Camera on, I was pleased with the tools I had at my disposal with this app. It comes across as a handy camera app, but when the video controls and the range of editing tools are added in, this would have been good value had the app been priced at 69 baht ($1.99), let alone at its bargain 9 baht. This app is recommended.
Graham K. Rogers teaches at the Faculty of Engineering, Mahidol University in Thailand. He wrote in the Bangkok Post, Database supplement on IT subjects. For the last seven years of Database he wrote a column on Apple and Macs. After 3 years writing a column in the Life supplement, he is now no longer associated with the Bangkok Post. He can be followed on Twitter (@extensions_th) |
|

For further information, e-mail to
Back to
eXtensions
Back to
Home Page