Snapster: A Sophisticated but Free Photography app for the iPhone

AMITIAE - Monday 22 April 2013
|
Snapster: A Sophisticated but Free Photography app for the iPhone |
|
|
|
By Graham K. Rogers
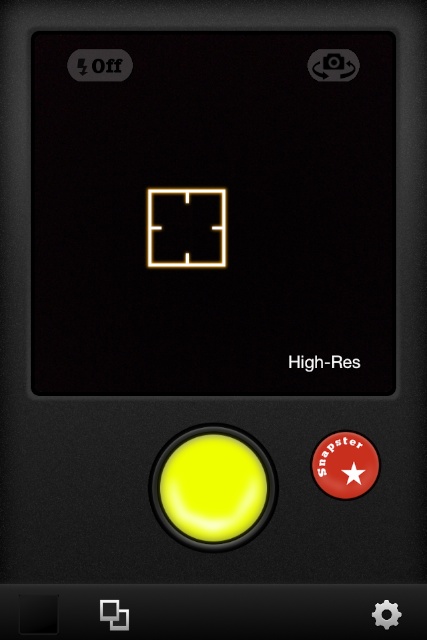
SnapsterThe opening screen is a nice exercise in design with its clean interface. After a second or so, the screen appears to turn 90 degrees and a working panel is shown. Most of the panel is taken up with a square display of the scene viewed by the camera. Within that display are ON/OFF/AUTO controls for flash and an icon to reverse the camera, so that a picture of the user can be taken.
At the bottom of the screen are three controls: a link to the Lightbox (the photo library for Snapster), with a maximum of 100 images; a file icon to import an image from the library; and a gear icon for settings. Apart from links to other apps and the version number (1.2.0) the main setting here is to turn On or Off GPS embedding. If this is turned on, the app needs confirmation. Above these controls (below the camera display) the screen is dominated by a yellow button: the shutter. To the right of this is a red button that accesses a number of filters that are available. Selecting and pressing the shutter takes a photograph with that filter pre-applied. The original image is not saved in the iPhone Photo Album, however it may be viewed within the app and saved/exported. With editing things can be a touch complex as there are two ways to work on images: the direct use of a filter with a photograph (above), or a more dense process by working with any image in the library.
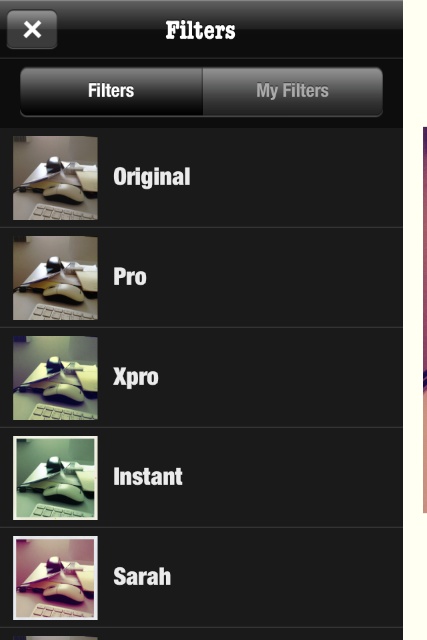
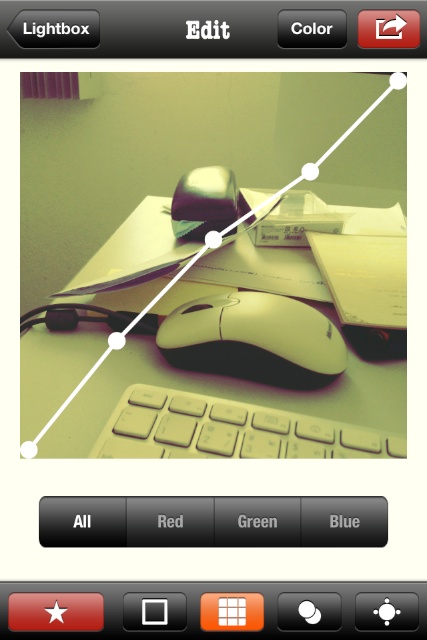
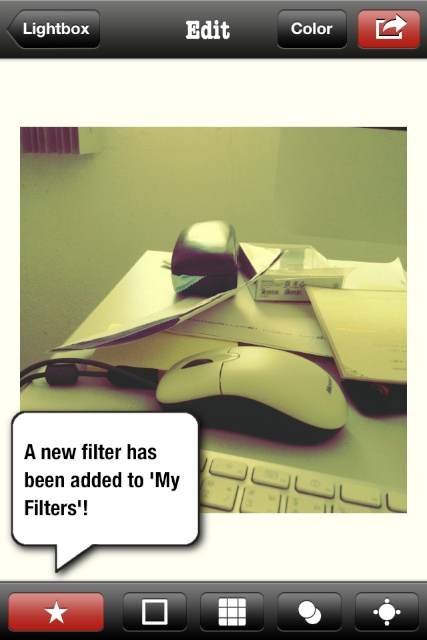
EditingThe Edit panel has 4 controls at the top: Lightbox, to take a user back to the libary; a button to toggle between Color or Black & White; and an Export icon. As with other parts of the app, this Export has just a little more than the usual app.As well as Save Photo, there is also Save Filter, so a user may change filter settings and keep the new output type; Share will send an image to Facebook, Flickr, Picasa, Tumblr, Twitter, or export via email; an image may also be opened in Instagram or in Other apps, depending on which the user has installed. When using the "Other Apps" (or certain other save options) the user is prompted to select a size, from Small (820 x 820) to Actual Size (2448 x 2448). Depending on the size, saving may take a few seconds. Before saving an image, however, the user may want to apply certain editing changes to the image and there is a rich selection of options. The bottom of the Edit panel is dominated by a red star icon to the left. Pressing this reveals a selection of some 43 filters (plus Original), although some of these are locked.

CommentsUnlike the other apps from Youthr that I have looked at so far, I did not find Snapster as easy to use initially, particularly in the "click, adjust, save" way that many users will be used to (or demand). However, the app has a considerable number of strengths once it is learned.The extra filters and effects may be added with a Snapster+ in-app purchase of $1.99 although the app as it comes (free, no less) is already comparatively powerful.
For those who like a little more sophistication with the way their photography apps can be controlled and used, Snapster has so much to offer, especially at its price. It is free.
Graham K. Rogers teaches at the Faculty of Engineering, Mahidol University in Thailand. He wrote in the Bangkok Post, Database supplement on IT subjects. For the last seven years of Database he wrote a column on Apple and Macs. |
|

For further information, e-mail to
|

|